How to Create and Edit Douyin Forms?
By creating Douyin forms via MsgBox, you can synchronize leads collected from Ocean Engine (Douyin Ads) to your inbox and contact center in real-time.
Prerequisites
Before creating a form, please ensure that you have successfully connected and authorized your Douyin Ocean Engine account in the Ads module.
Phase 1: Basic Configuration
- Enter Settings: Go to Settings > Channels > Douyin.
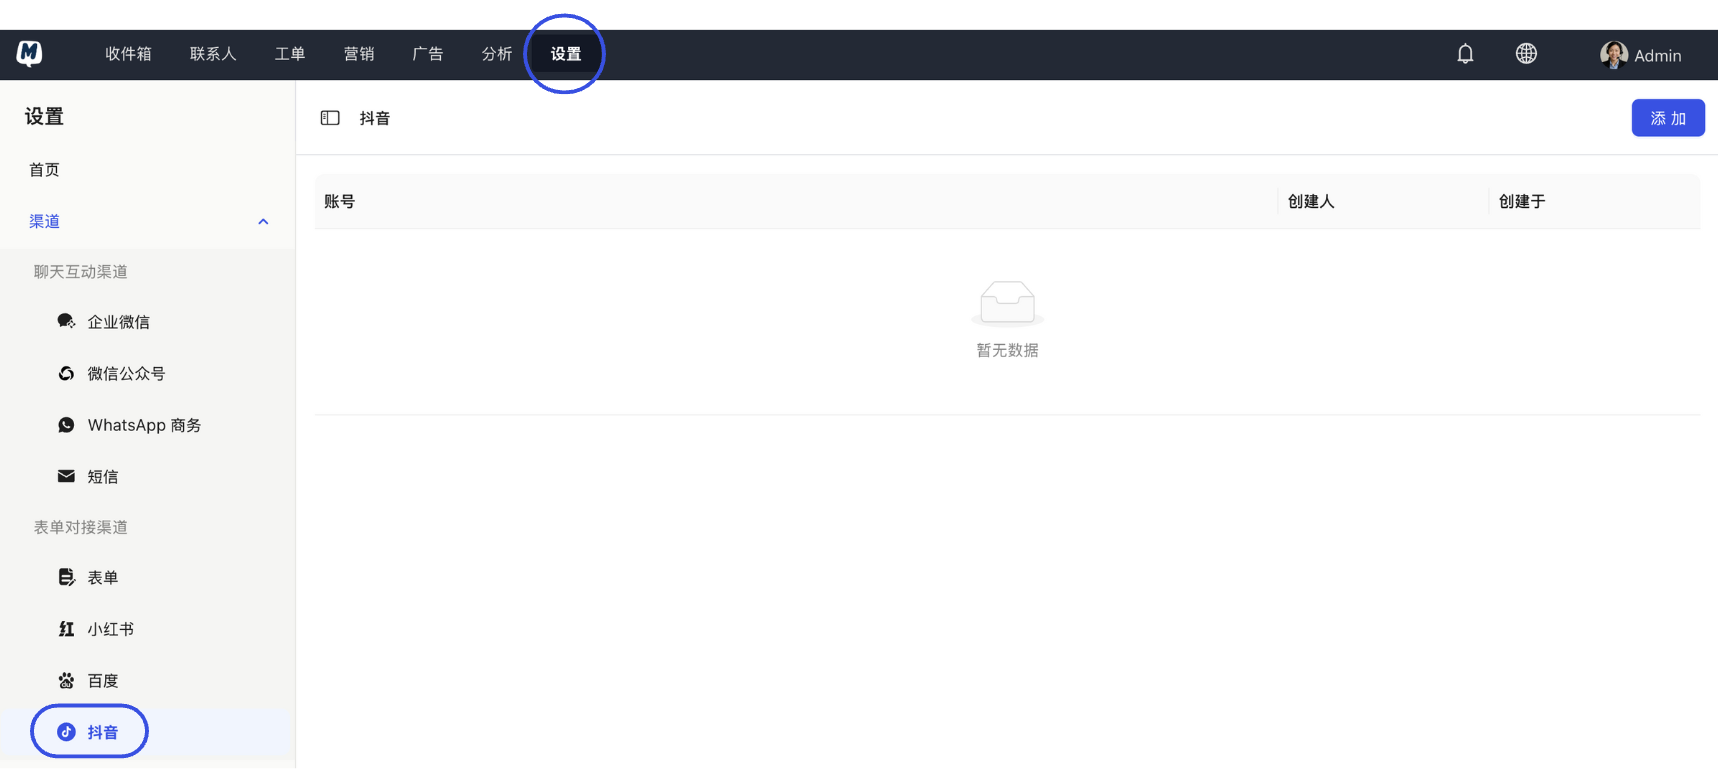
- Initiate Creation: Click the "Add" button in the top right corner and set your Form Name.
- Parameter Settings: On the configuration page, you can adjust the following options as needed:
- Form Expiration: Set to "Never Expire" or a specific date. Once expired, the link will no longer accept submissions.
- Sync Conversation Creation: When enabled, a chat conversation will be automatically generated in the inbox when a user submits the form.
- Allow Editing of Submitted Info: When enabled, users can re-edit their submitted form content within the conversation window.
- Allow Duplicate Submissions from Same IP: Anti-spam setting. If enabled, multiple submissions from the same IP address are allowed.

- Click "Save" to enter the details page.
Phase 2: Form Interface Design
- Enter Designer: Click "Form Design" on the form details page.
- Edit Description: Enter the guidance text or description to be displayed to users.
- Add Fields: Click "Add Field" and select the required field types (e.g., Name, Phone, Select box, etc.).
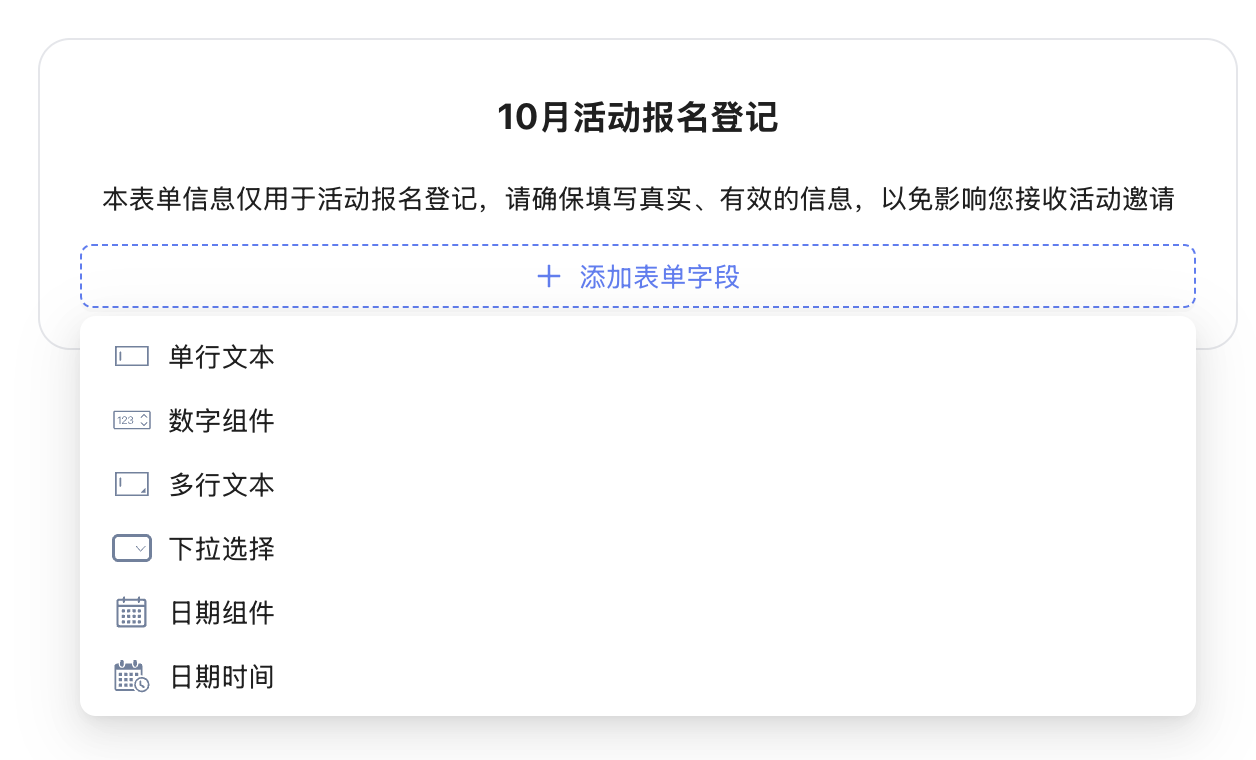
- Set Labels: Fill in the field display name (label) in the Form Item Settings and click "Confirm".
- Repeat the above steps until all required fields have been added.
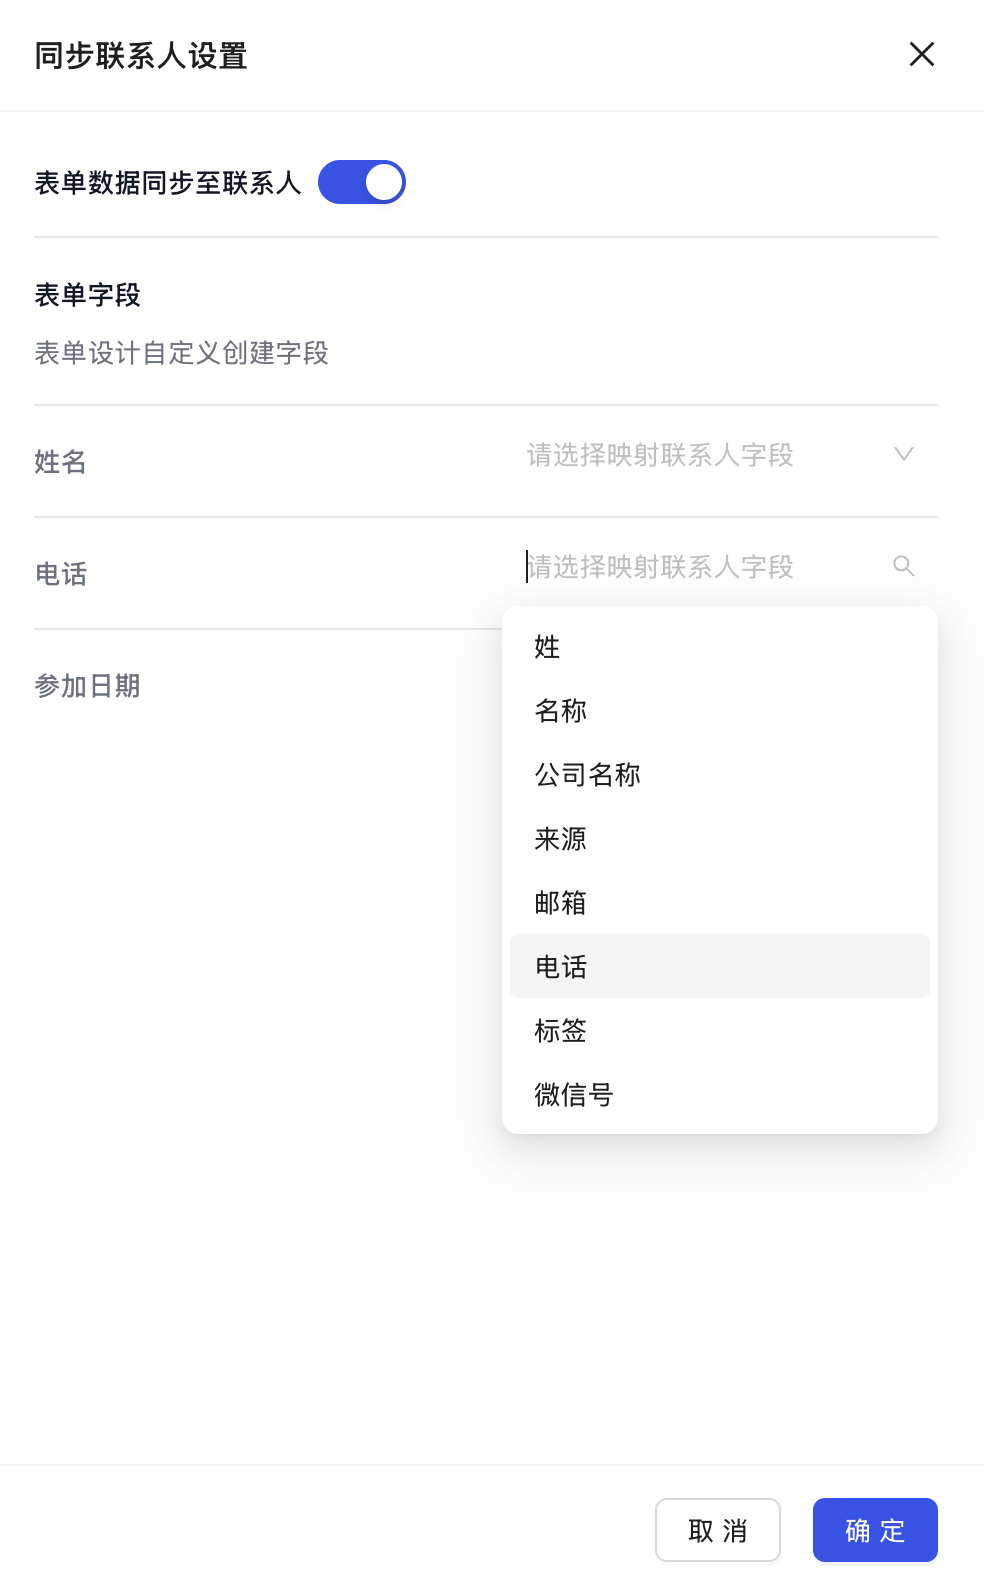
Phase 3: Data Sync Settings (Optional)
Perform this step if you want form data to be directly converted into MsgBox contact profiles.
- Enable Sync: Click "Sync Contact Settings" and switch on the "Sync Form Data to Contacts" toggle.
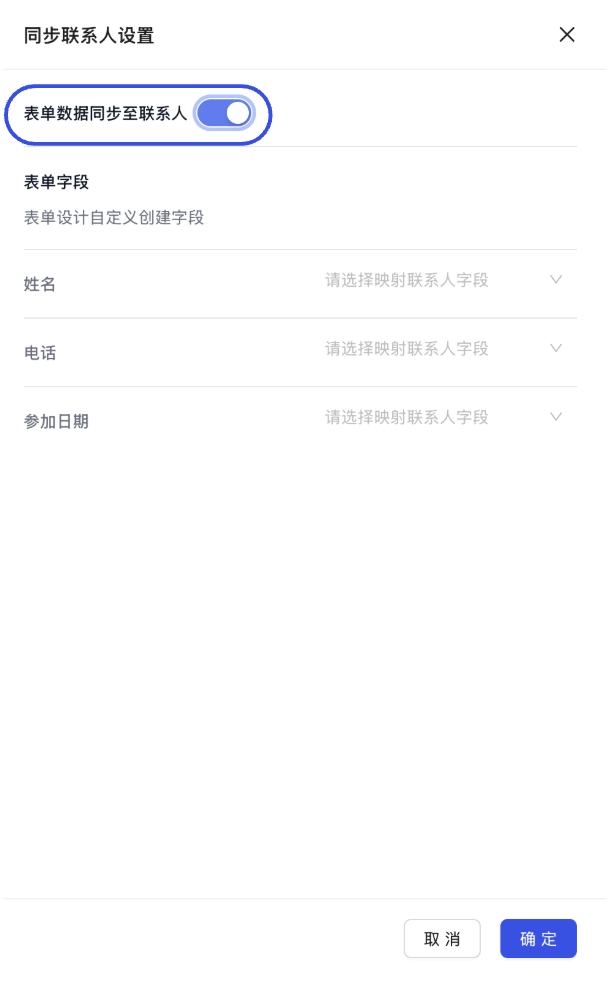
- Field Mapping: Match the "Form Fields" on the left with the existing "Contact Fields" on the right one-to-one.
- Tip: You don't need to map all fields; just select the core information.
- Tip: You don't need to map all fields; just select the core information.
- Complete Saving: Click "Confirm" and finally click "Save" in the top right corner.