HubSpot Integration Setup Guide
Connect MsgBox with HubSpot to automatically sync your social media contacts (WeCom, WhatsApp, etc.) and tickets directly into your HubSpot CRM.
Prerequisites
- A MsgBox account.
- A HubSpot account with Super Admin permissions (or App Marketplace access).
1. Install the Integration
Follow these steps to authorize the connection between MsgBox and HubSpot.
Step 1: Navigate to the Connections Page
- Log in to your MsgBox dashboard.
- Go to Settings > Connections in the left sidebar.
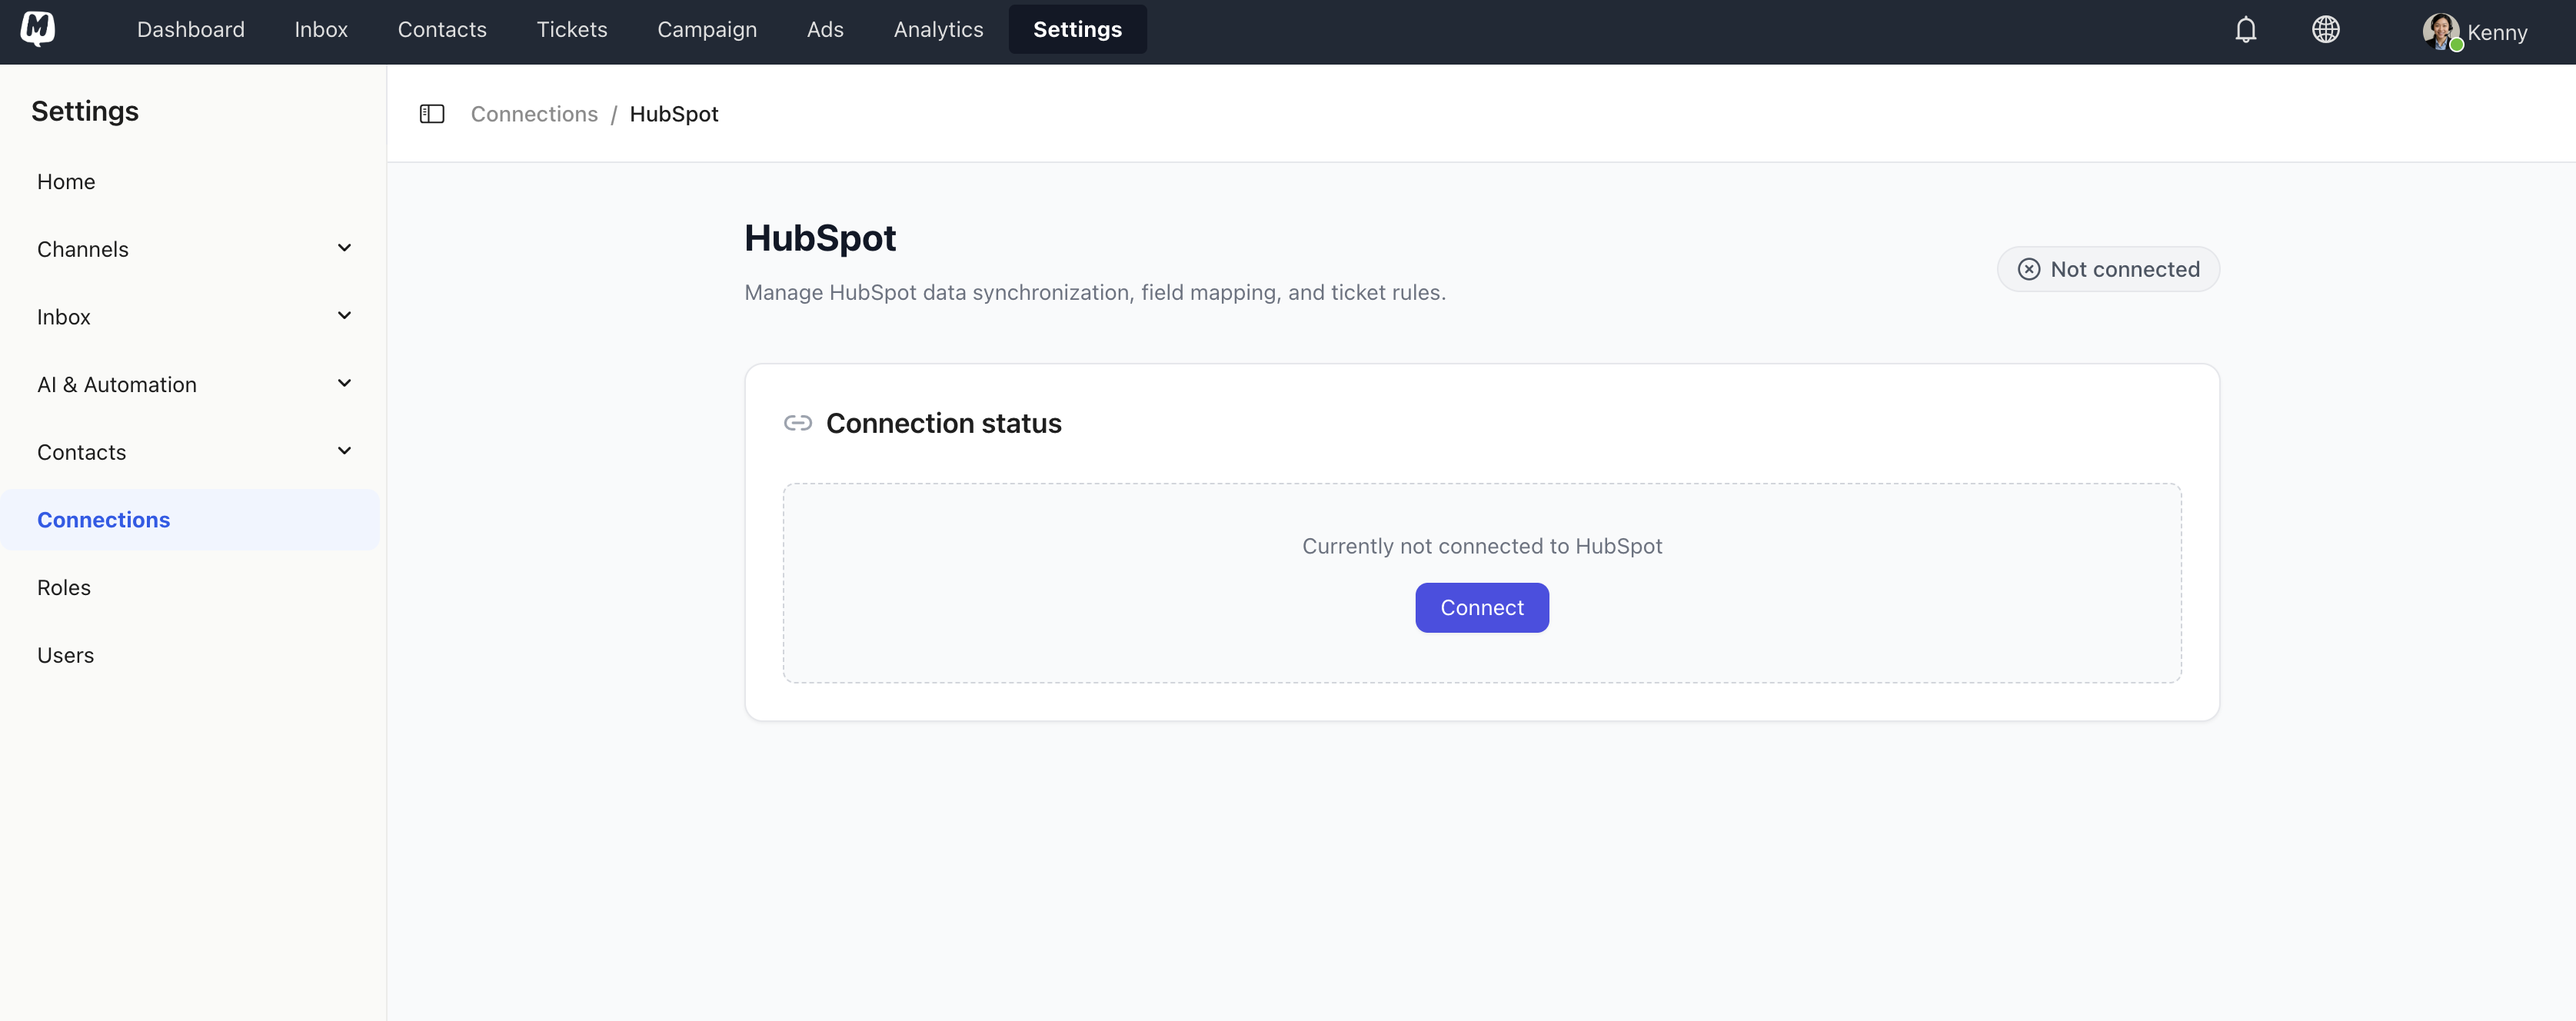
Step 2: Initiate Connection
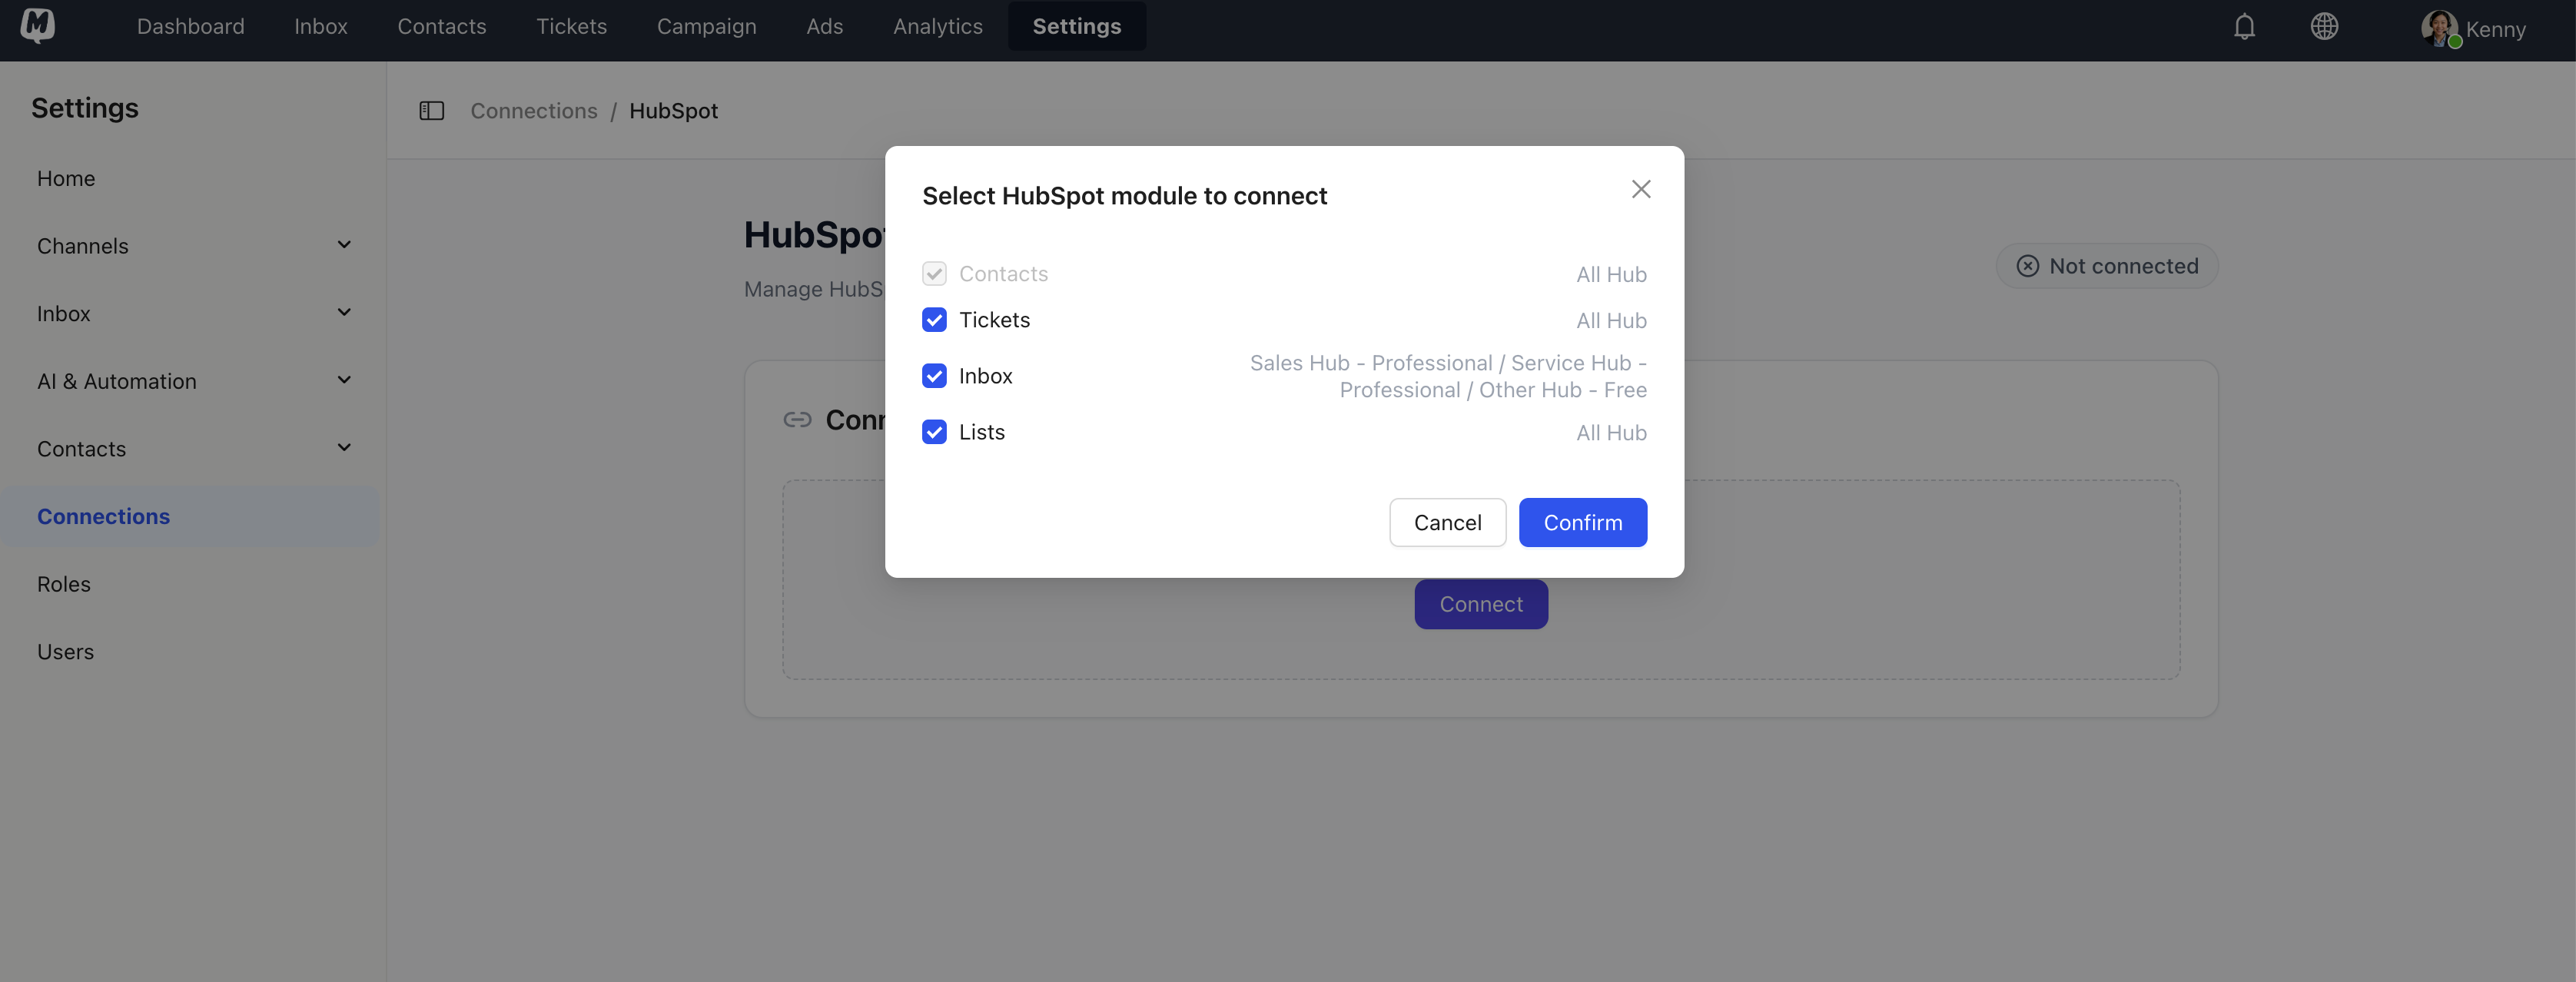
- Click the Connect button on the HubSpot card.
- A window will appear listing the required permissions (e.g., Contacts, Tickets). Click Continue.
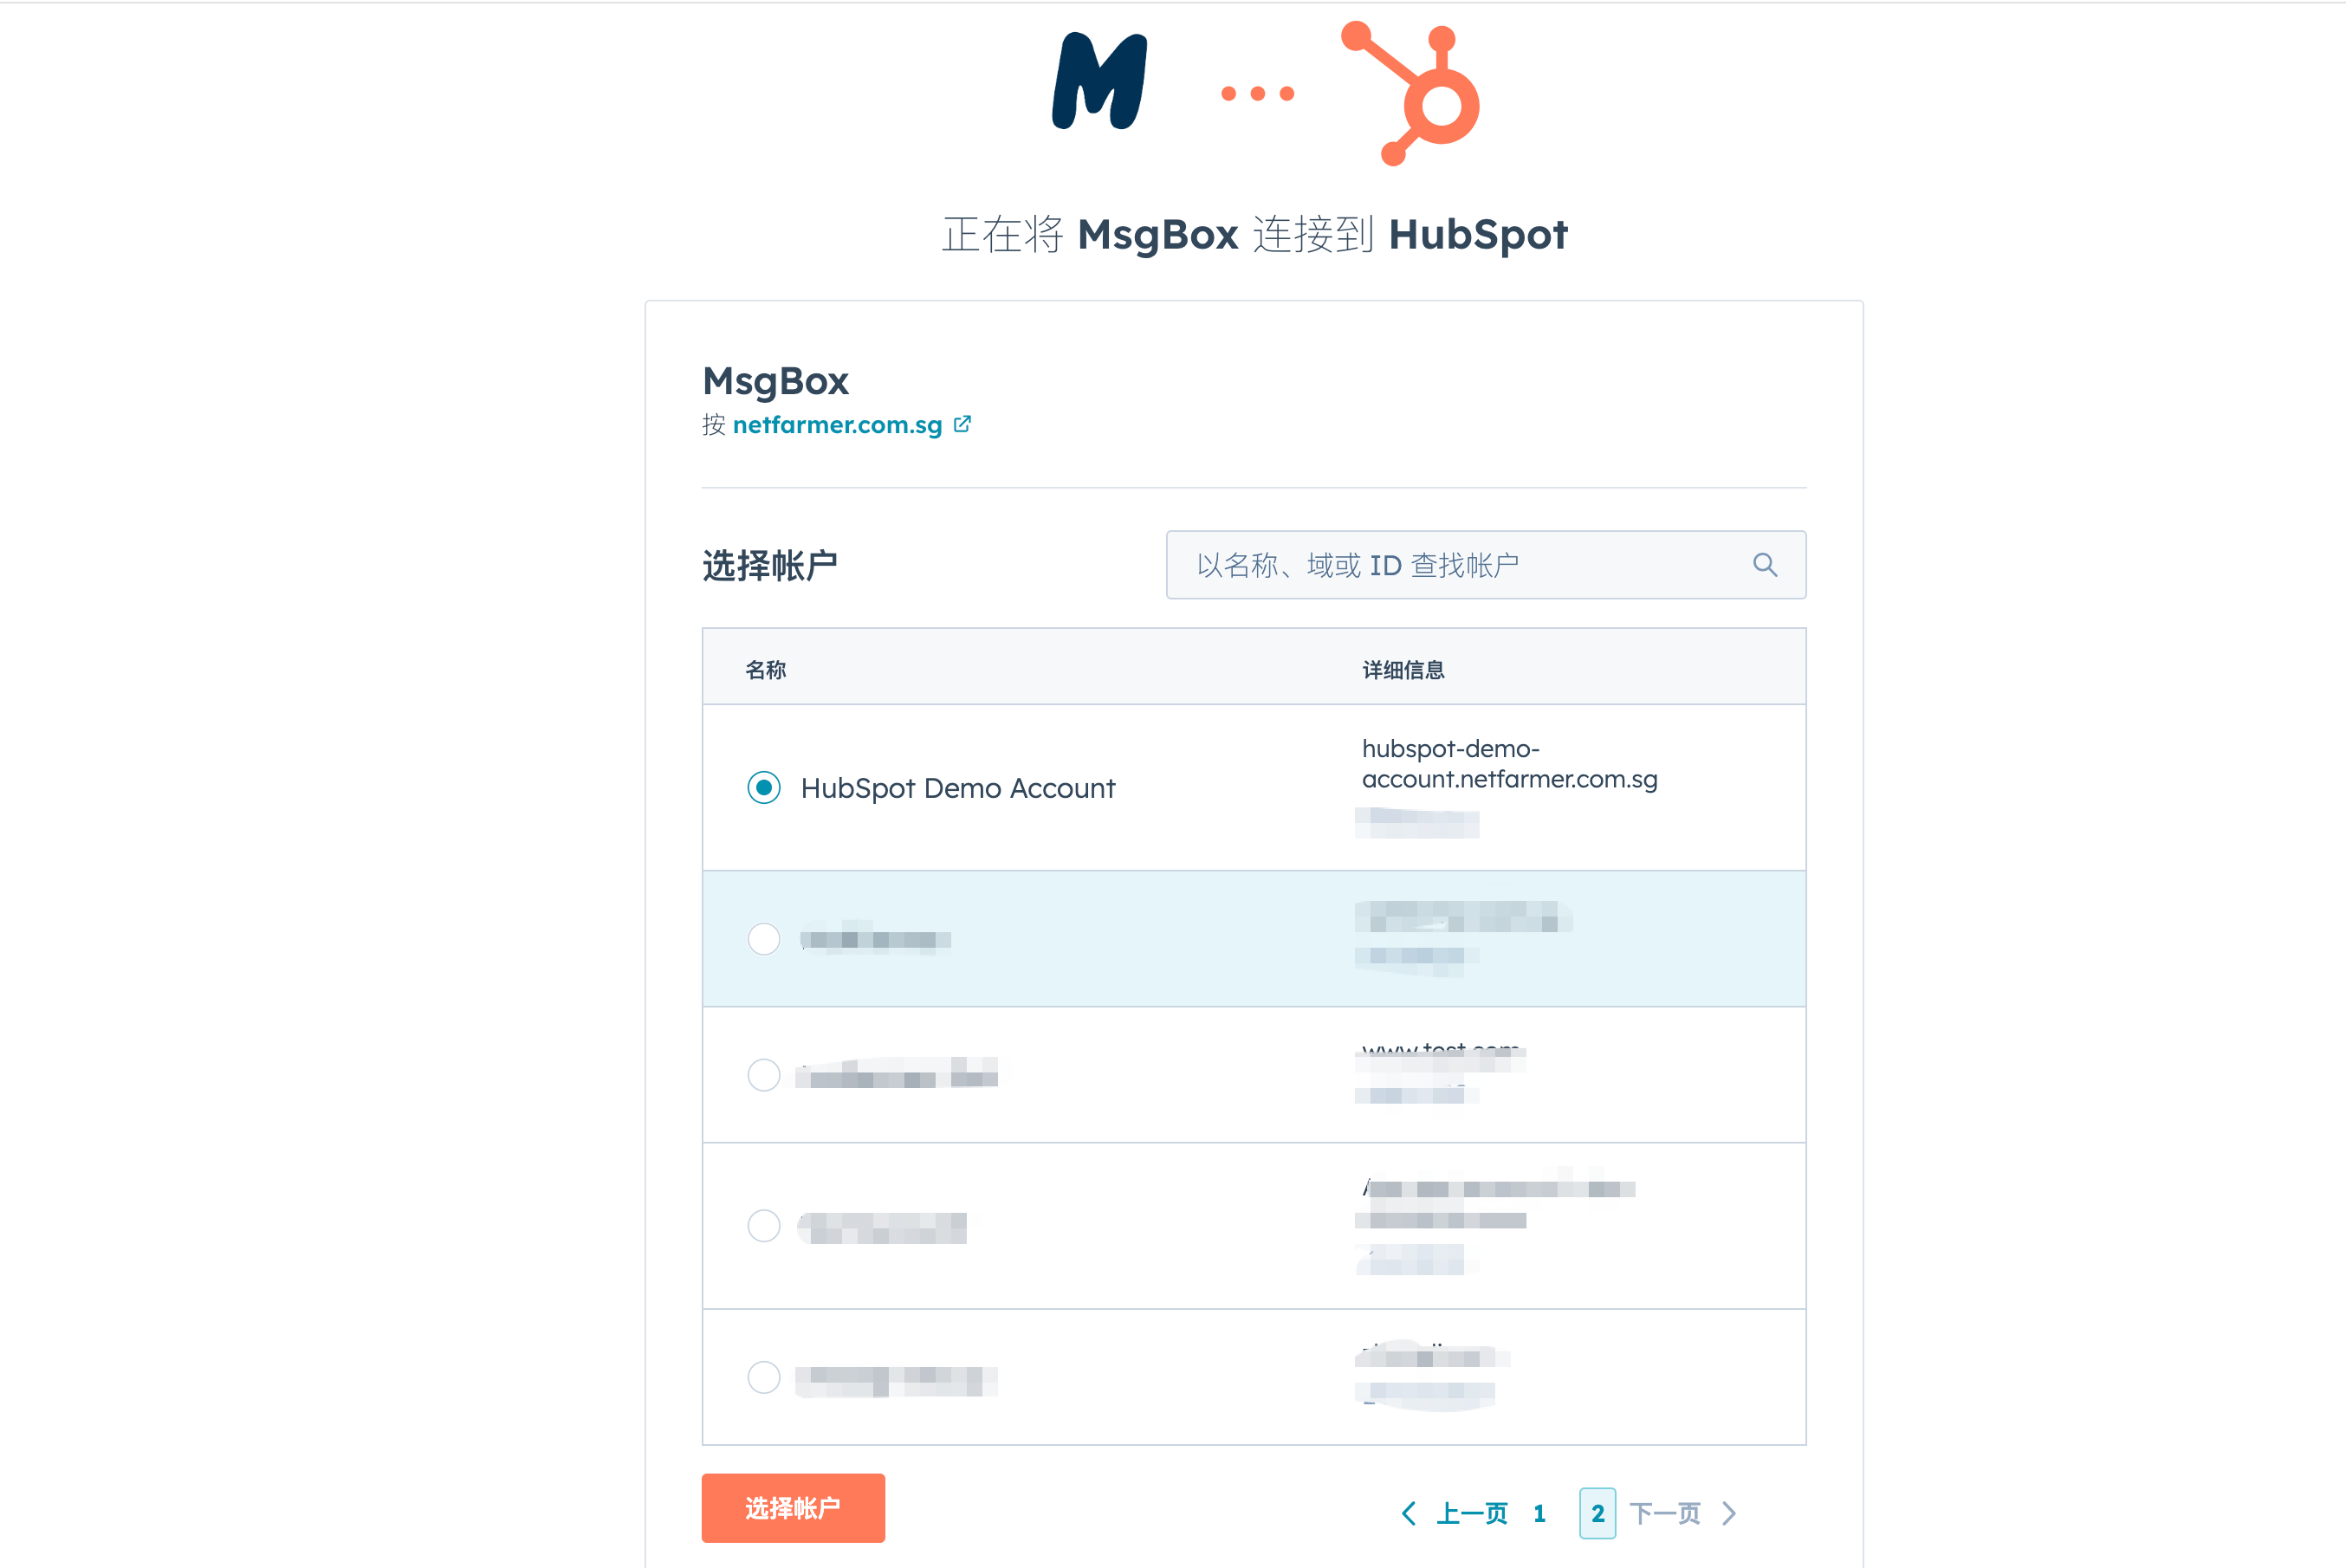
Step 3: Authorize via HubSpot
- You will be redirected to the HubSpot login page.
- Log in and select the HubSpot account you wish to connect.
- Review the requested permissions and click Connect App.
2. Configure the Integration
Once connected, you need to configure the data flow between MsgBox and HubSpot.
Step 1: Configure Sync Settings
- You will be redirected back to the HubSpot settings page in MsgBox.
- Toggle the Contact sync methods switch to enable the integration.
- Choose your Sync Direction:
- Two-way Sync (Recommended): Updates in MsgBox are reflected in HubSpot, and vice-versa.
- One-way (MsgBox to HubSpot): Only pushes data from MsgBox to HubSpot.
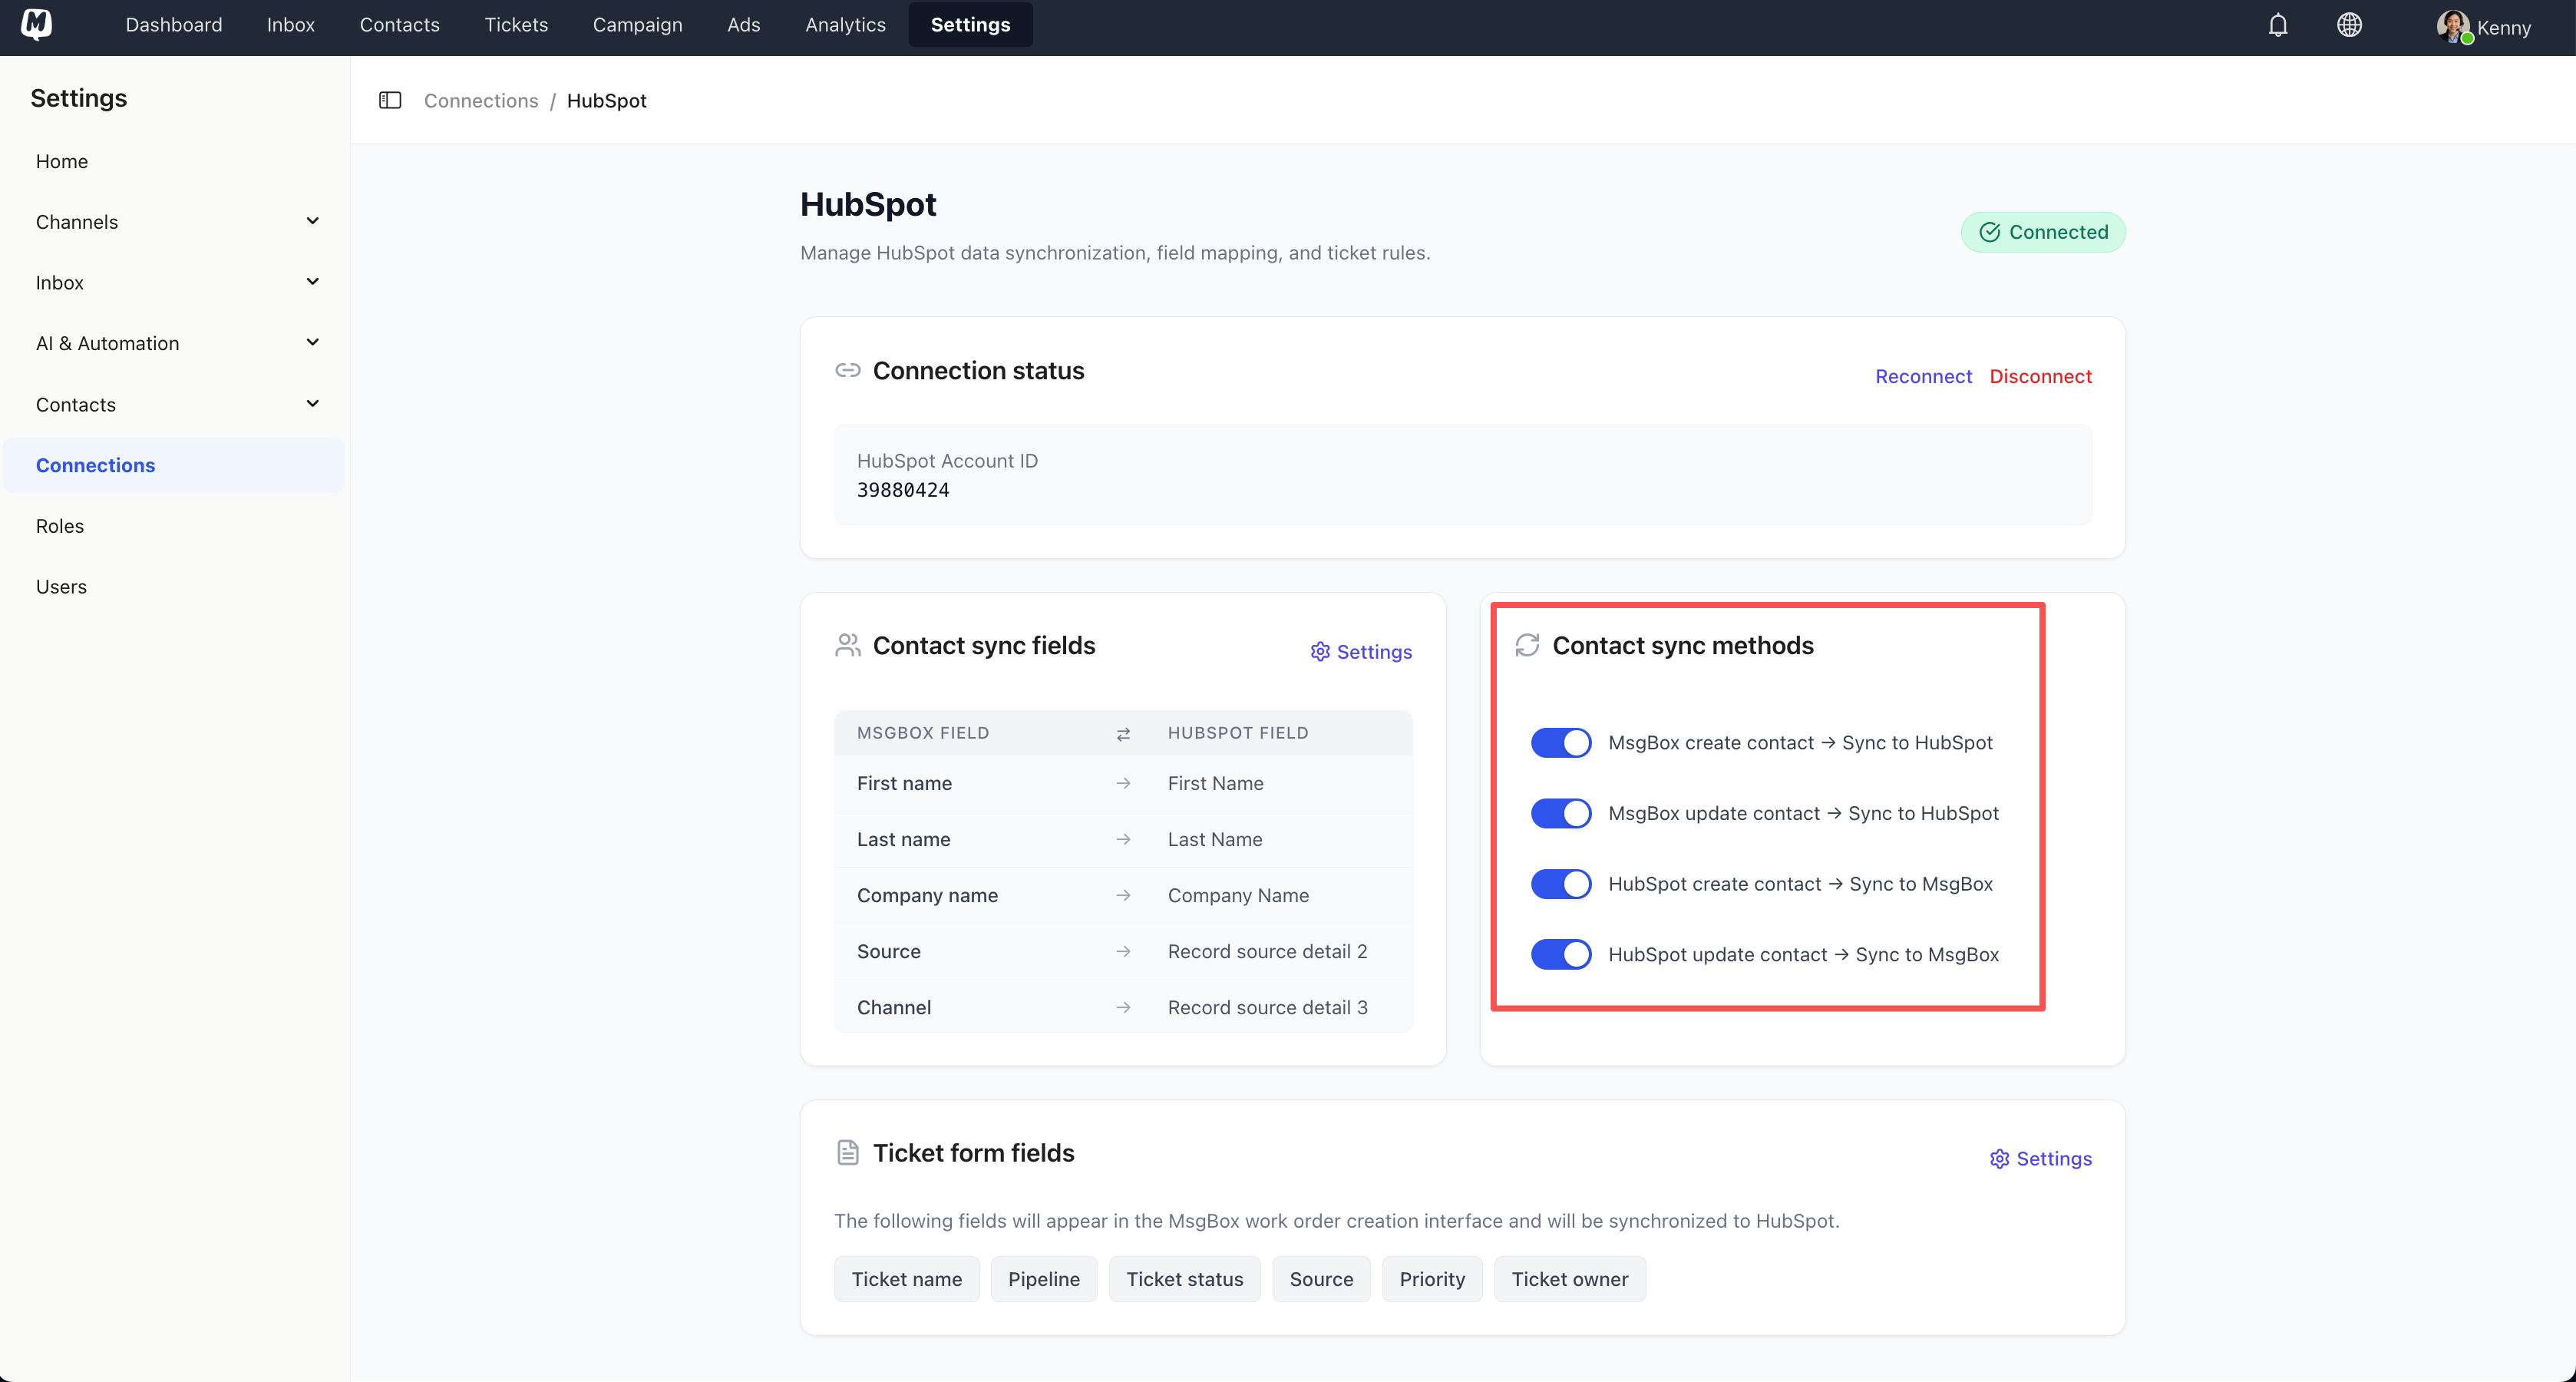
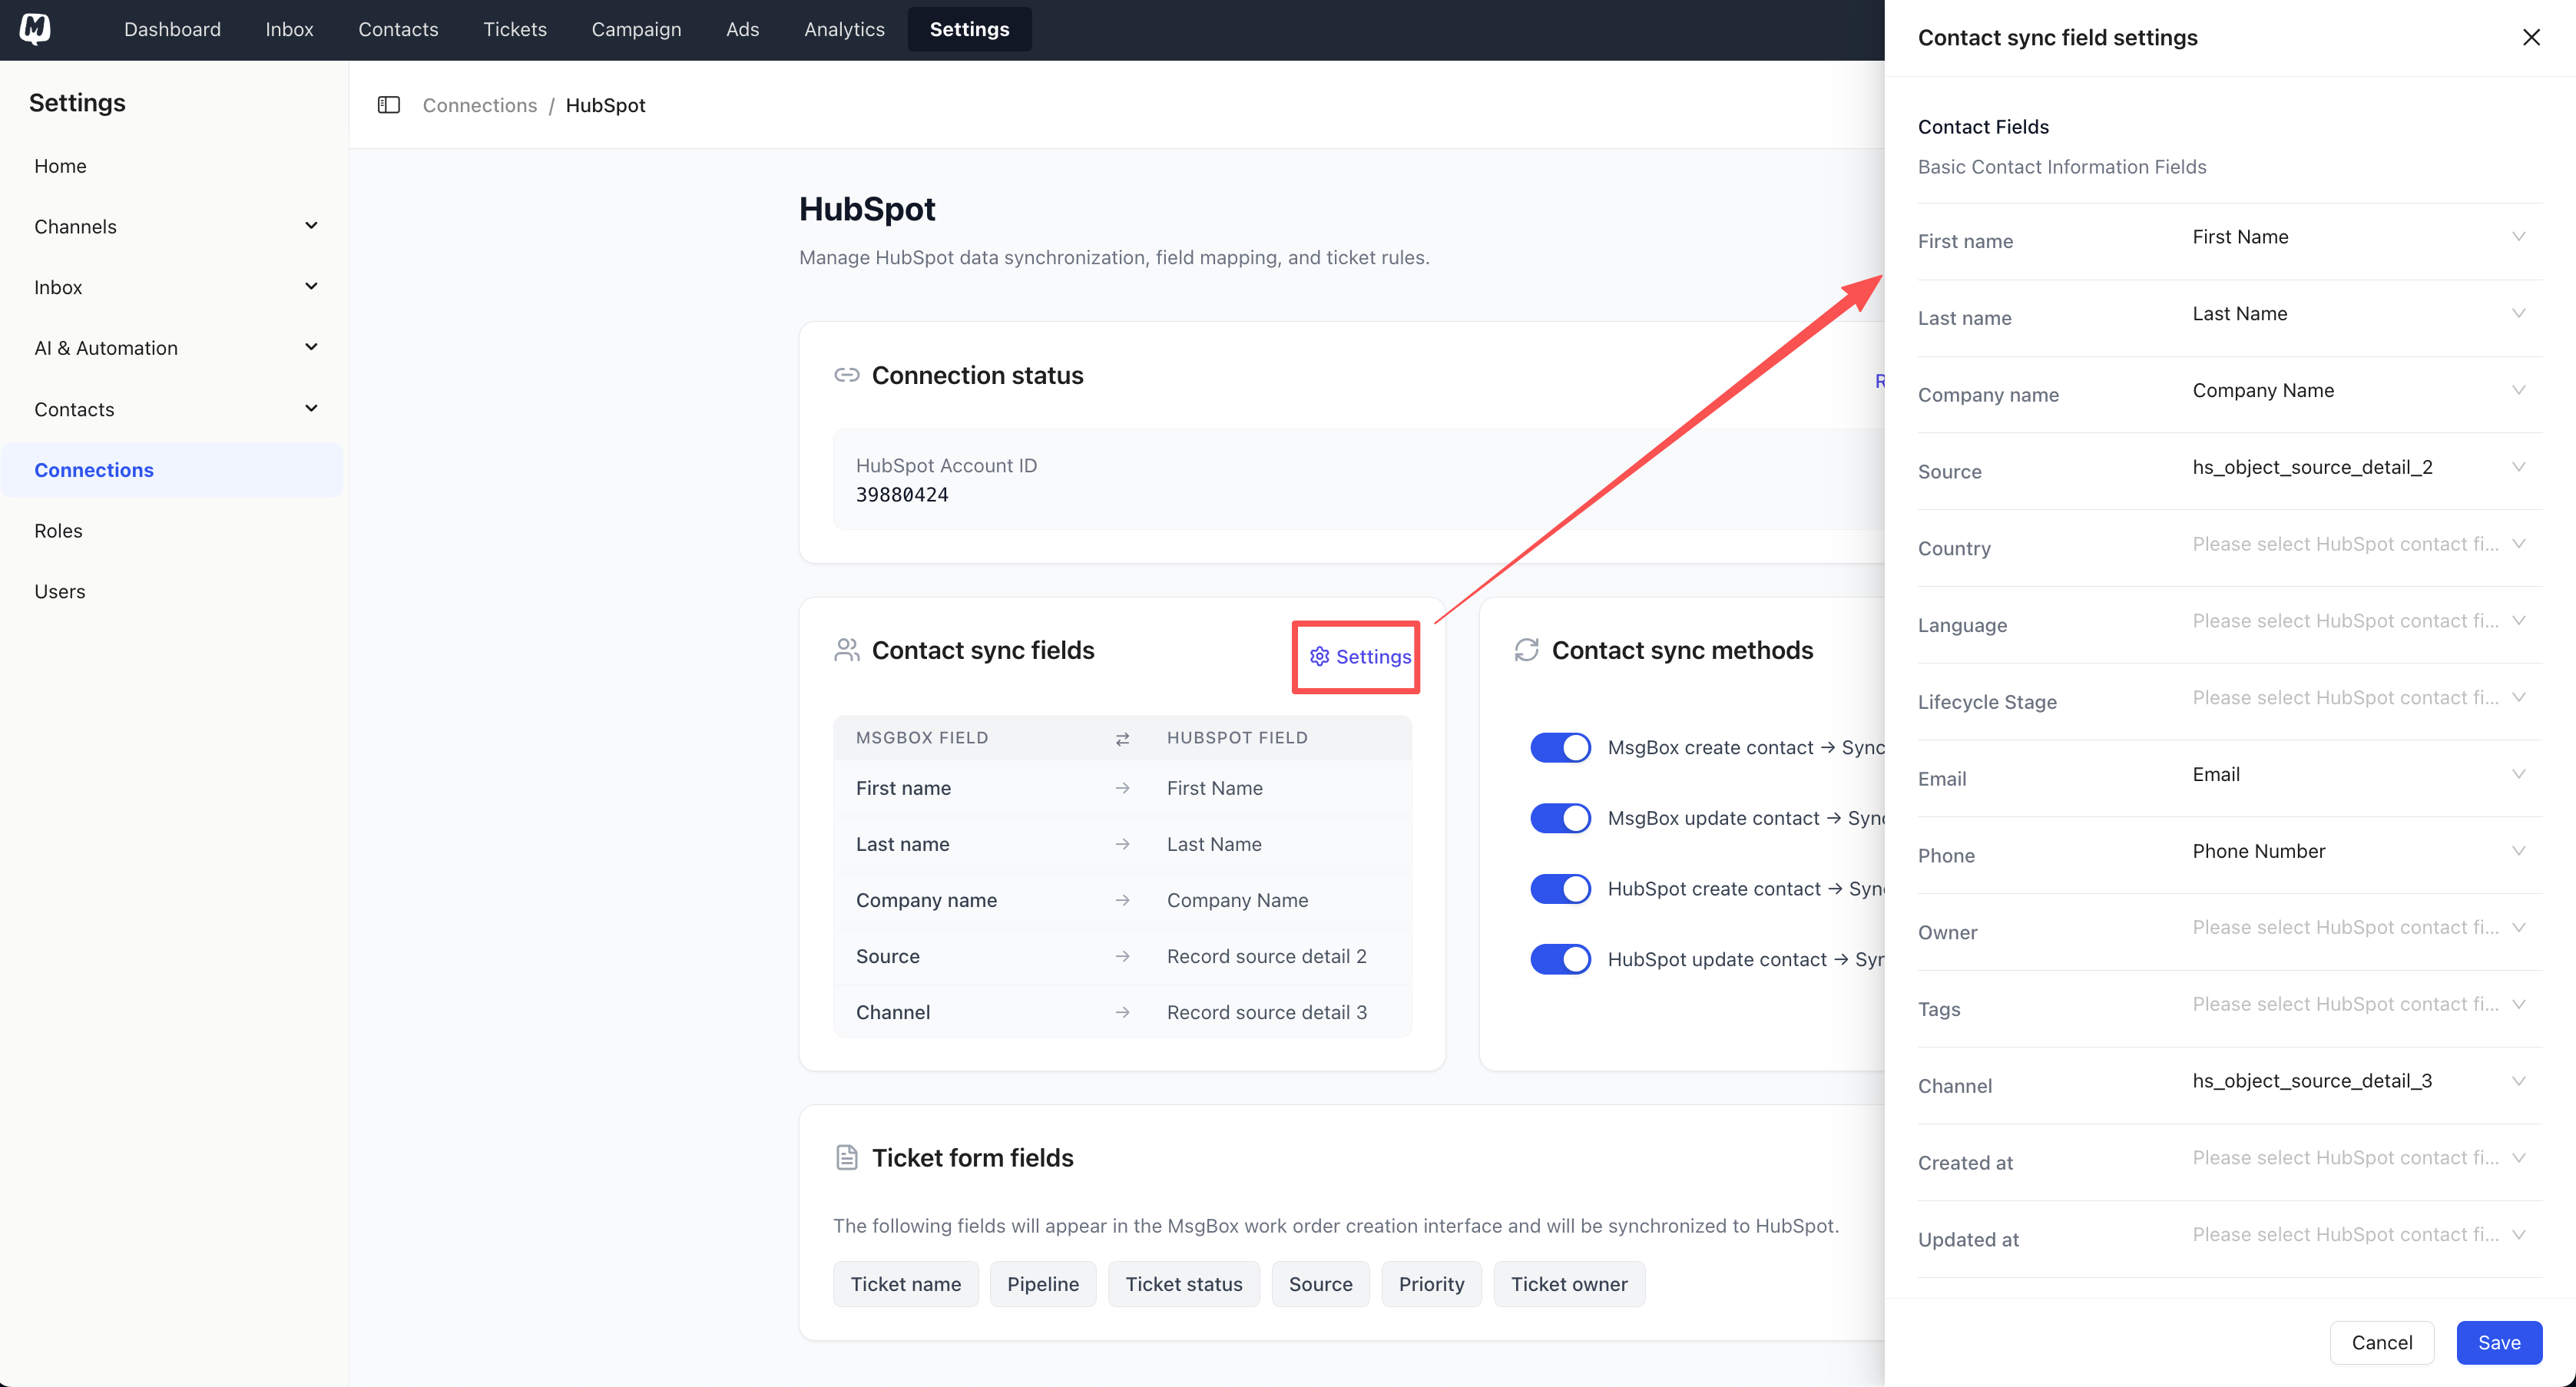
Step 2: Contact Field Mapping
Map MsgBox contact fields to corresponding HubSpot properties to ensure data consistency.
- Locate the Contact sync fields section and click the Settings button.
- On the left are MsgBox fields (e.g., First Name, Phone, Email).
- On the right, select the matching HubSpot property from the dropdown menu.
- Click Save.
Step 3: Ticket Form Configuration
Customize the ticket creation form used by agents within MsgBox.
- Locate the Ticket form fields section and click the Settings button.
- A configuration pop-up will open:
- Left Column (HubSpot Fields): Displays available ticket properties from your HubSpot account.
- Right Column (Selected Fields): Displays the fields agents must fill out when creating a ticket in MsgBox.
- Select the desired fields from the left to add them to the right.
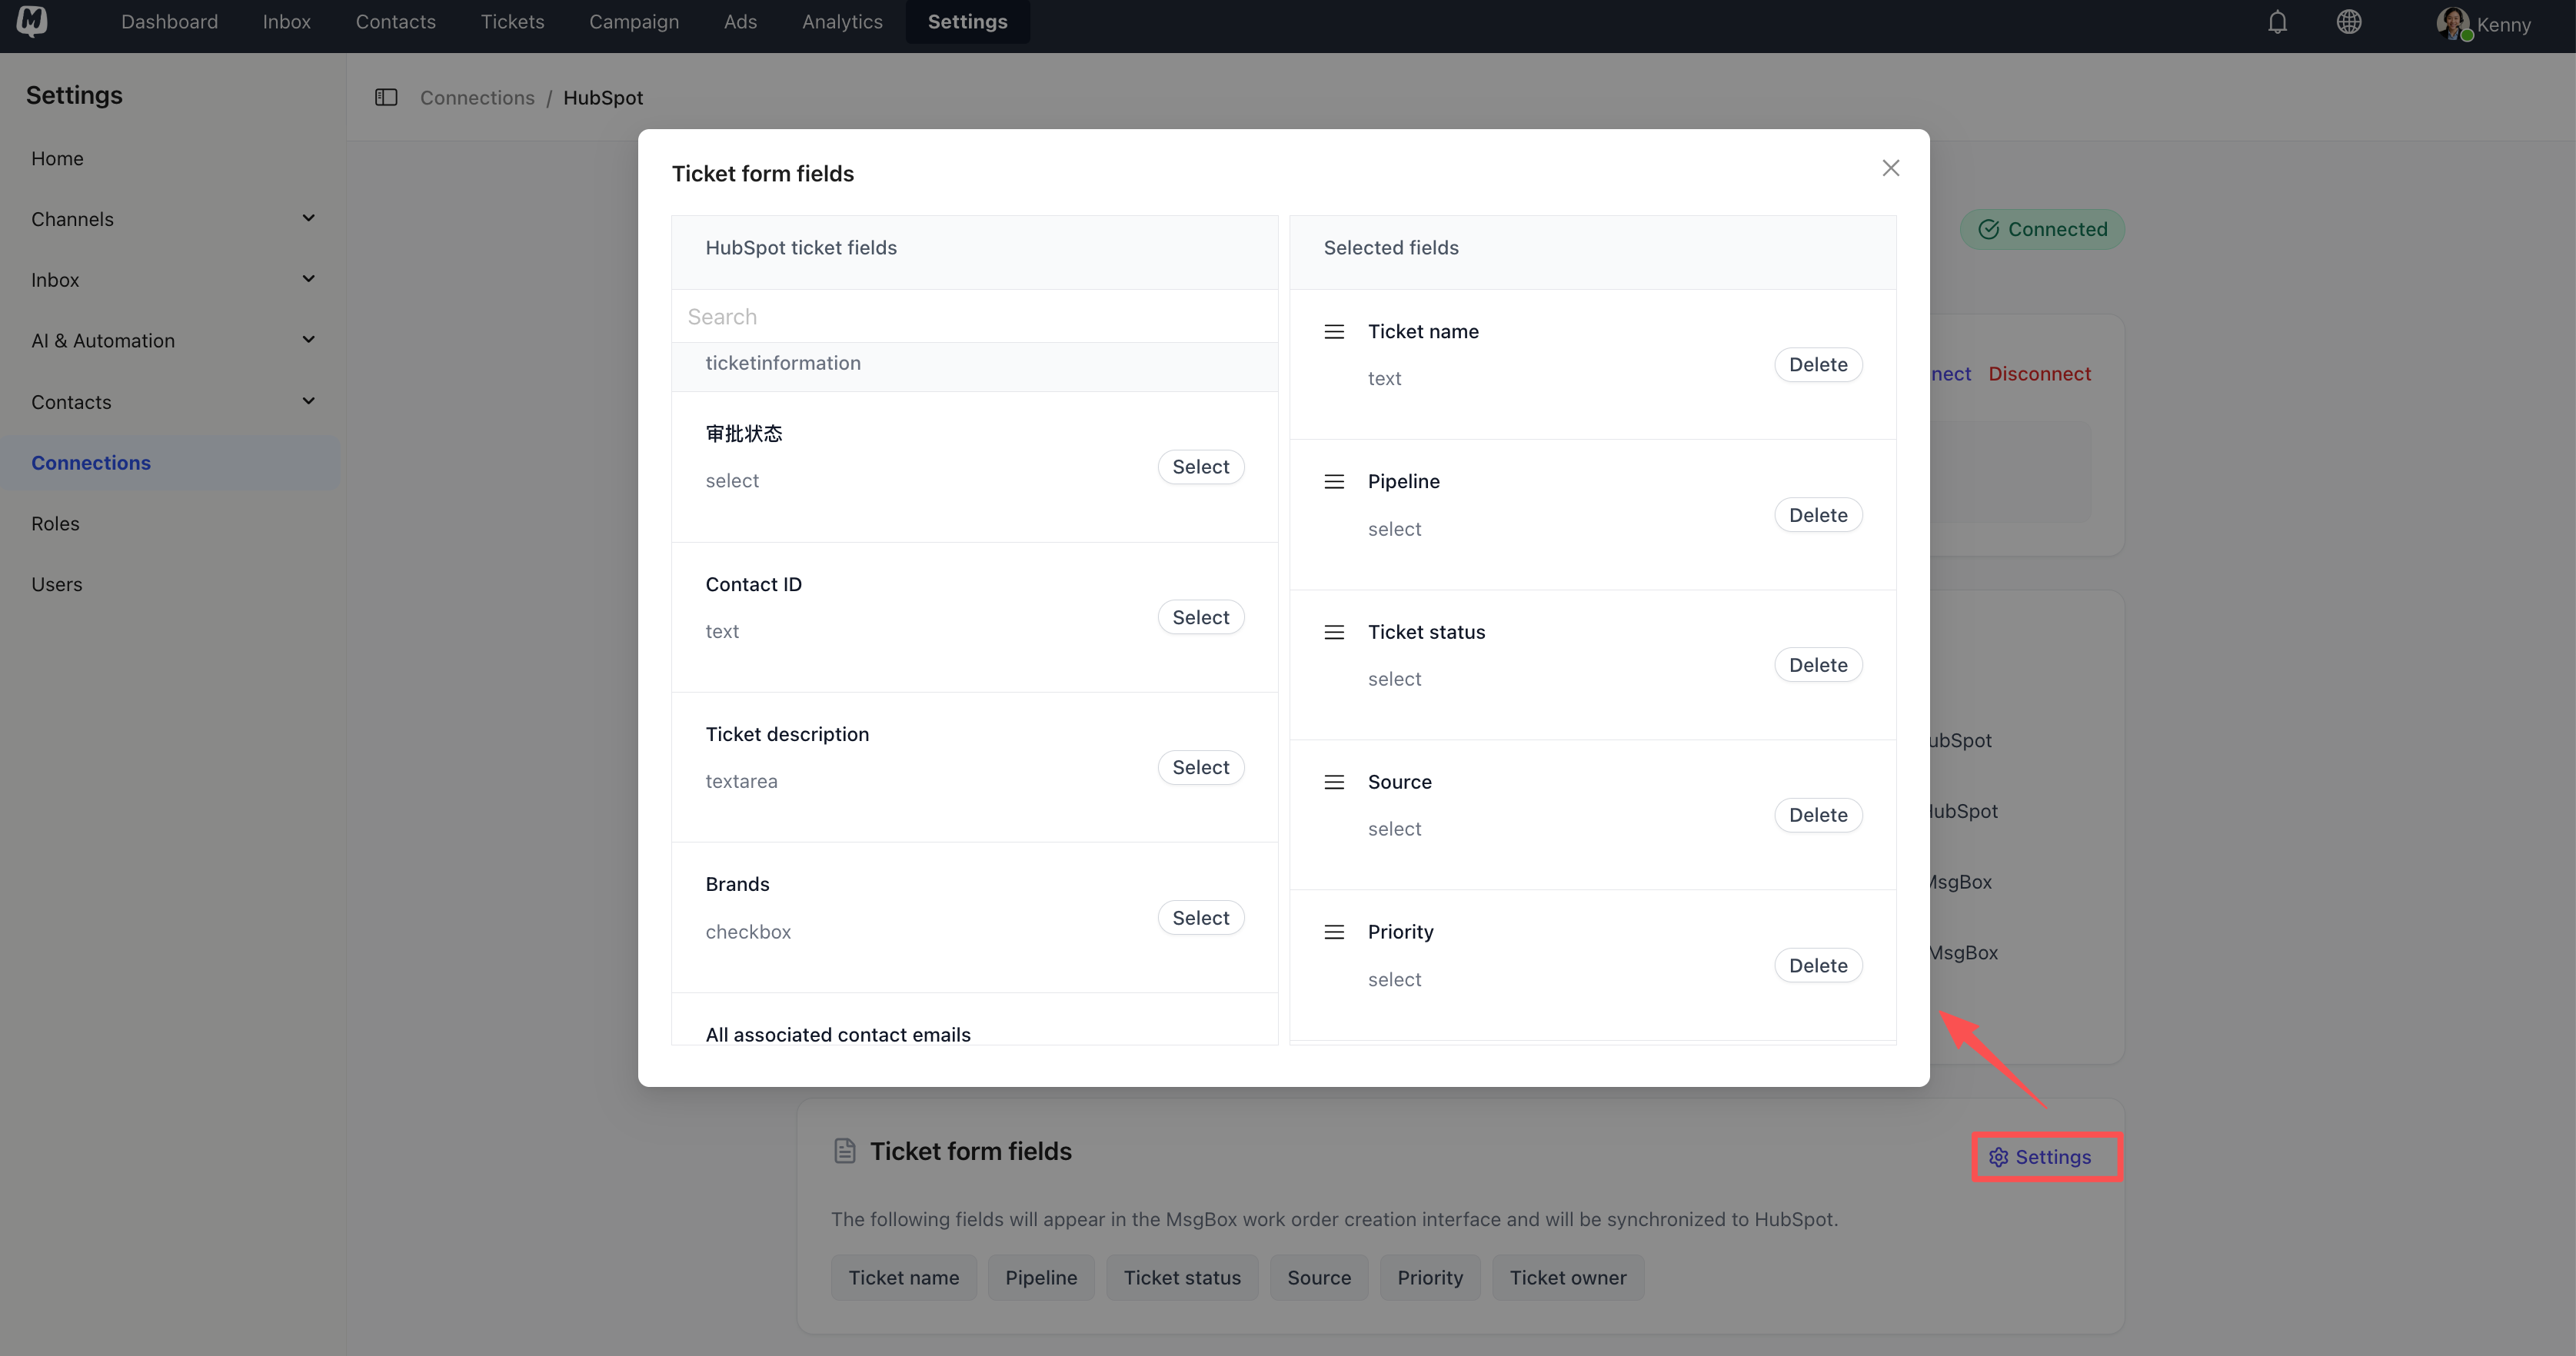
Once configured, tickets created in MsgBox will be directly synced to the HubSpot Tickets module and automatically associated with the corresponding HubSpot contact.
3. Using the Integration
After configuration, the integration runs automatically in the background.
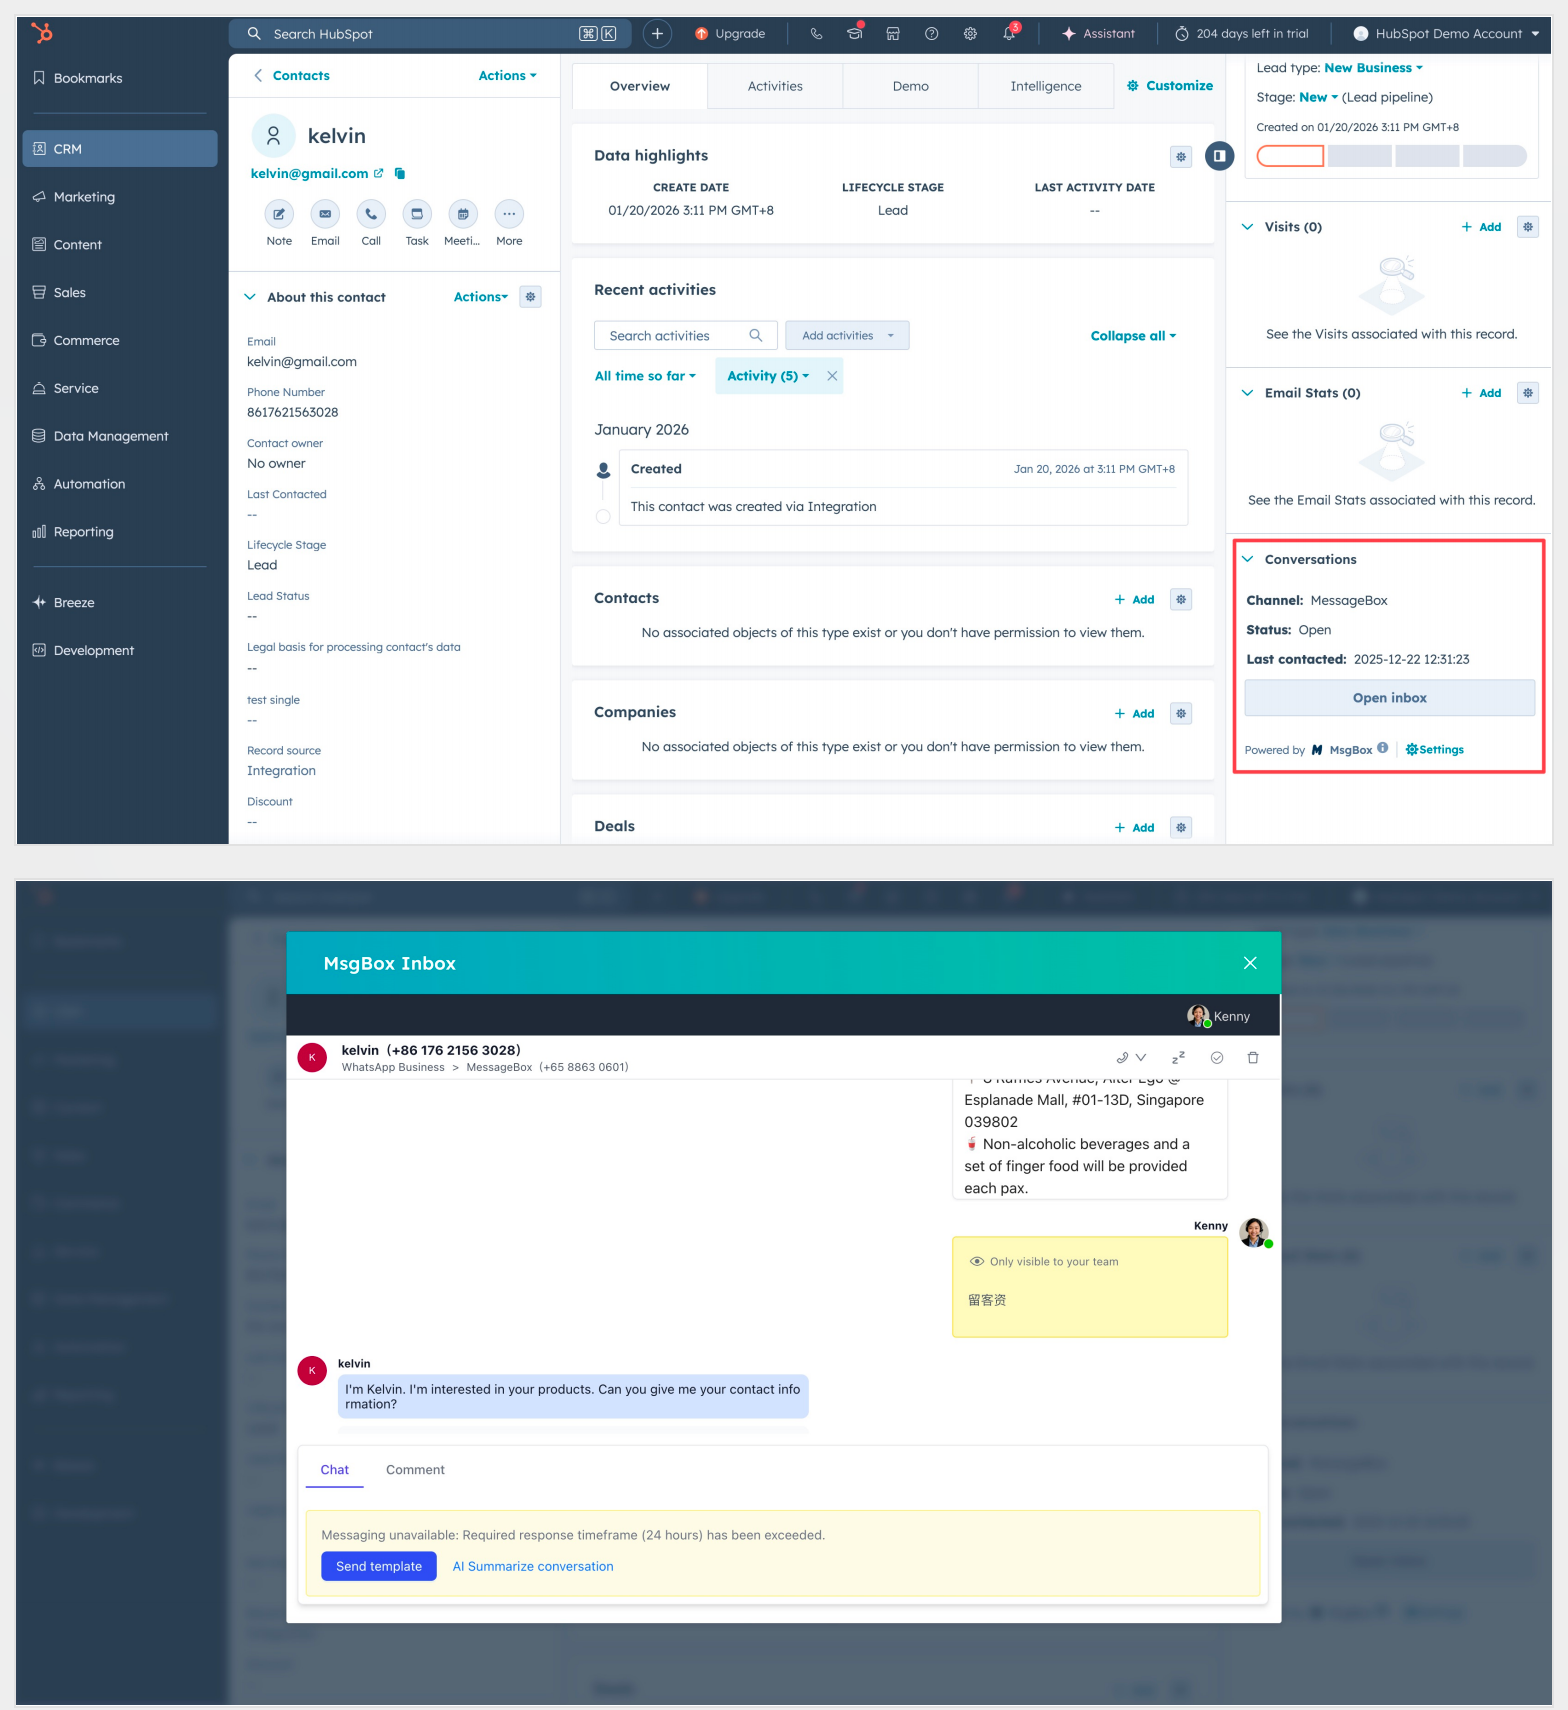
- Contact Sync: New contacts added in MsgBox via WeCom or WhatsApp will automatically appear as Contacts in HubSpot.
- Ticket Management:
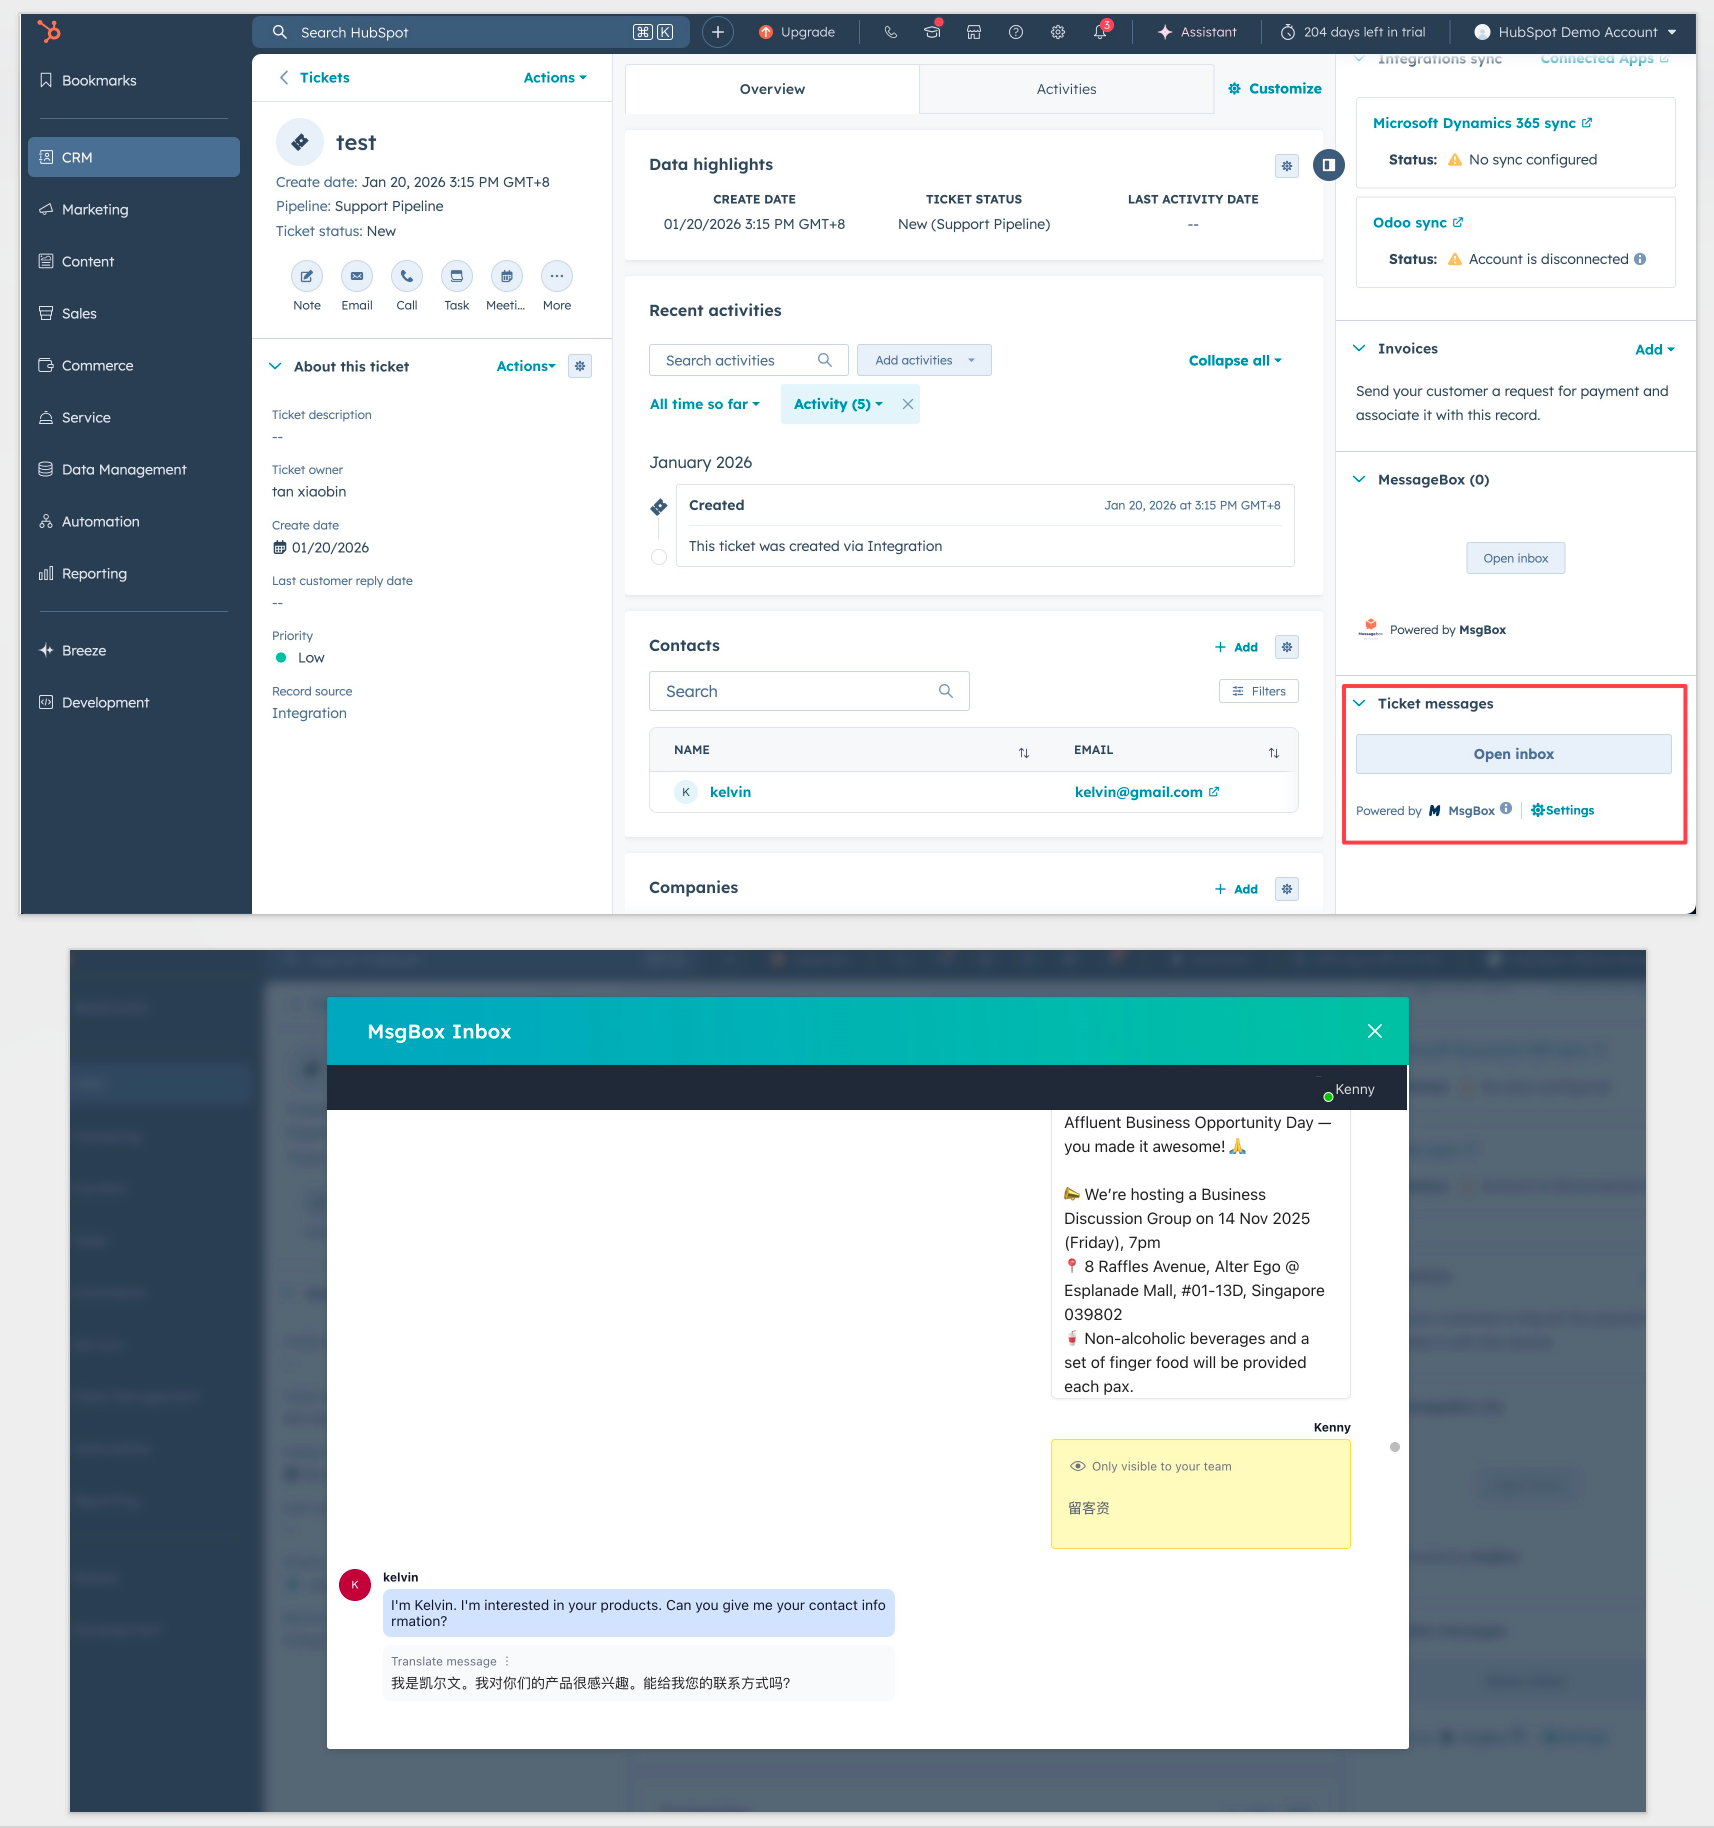
- When an agent creates a ticket in MsgBox, it immediately appears in your HubSpot Service Pipeline.
- The ticket is automatically linked to the contact in HubSpot, ensuring a complete view of the customer history.
4. Uninstall the Integration
If you need to disconnect MsgBox from HubSpot, follow these steps to ensure complete removal.
Step 1: Disconnect from MsgBox
- Go to Settings > Connections in MsgBox.
- In the Connection status card, click Disconnect and confirm.
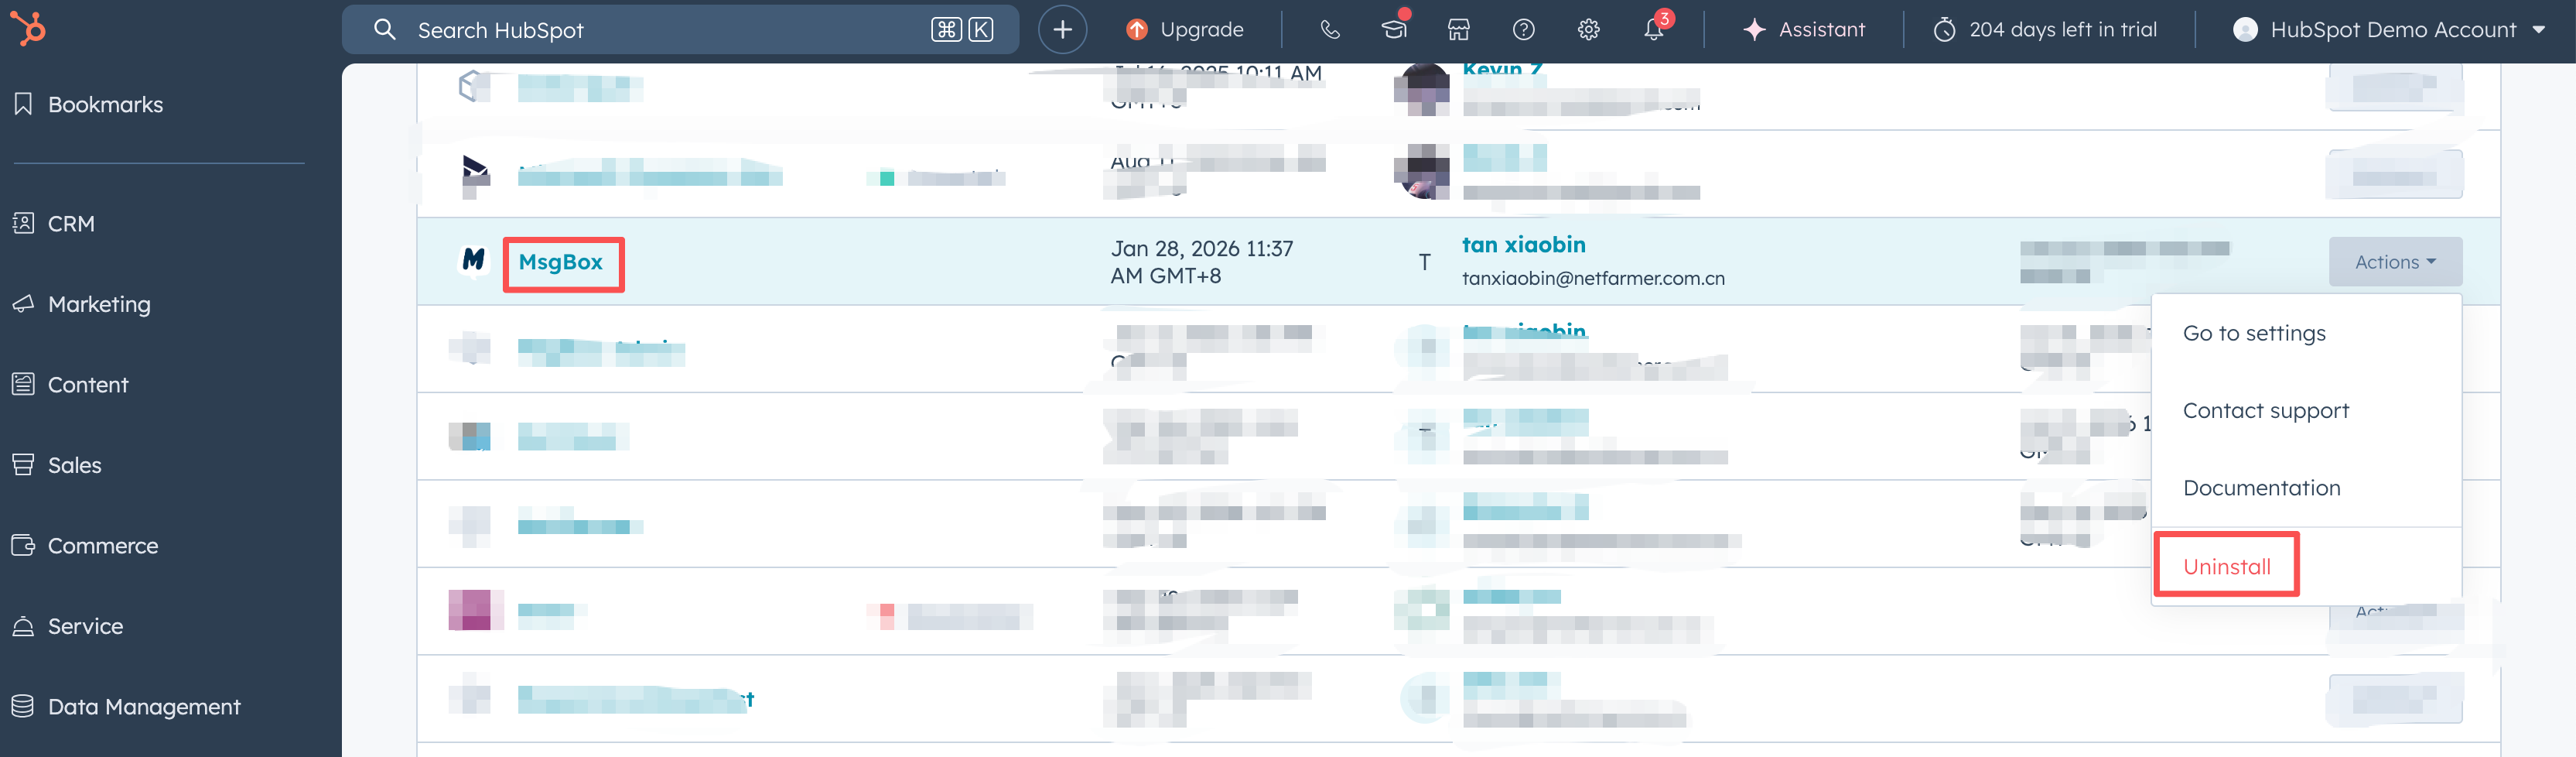
Step 2: Uninstall from HubSpot
- Log in to your HubSpot account.
- Go to Settings (gear icon) > Integrations > Connected Apps.
- Find MsgBox in the list.
- Click Actions > Uninstall.
- Type "uninstall" to confirm, then click Done.
Support
If you encounter any issues during the setup process, please contact our support team:
- Email: support@msgbox.chat
- Help Center: Visit our Documentation Center