How to Set Up Workflow Automation?
Workflow automation is a core tool for enhancing team efficiency. By pre-setting "Triggers" and "Action Steps," you can automate tasks such as assigning conversations, sending auto-replies, and tagging contacts, ensuring customer requests receive a response within seconds.
Steps
Step 1: Create a Workflow
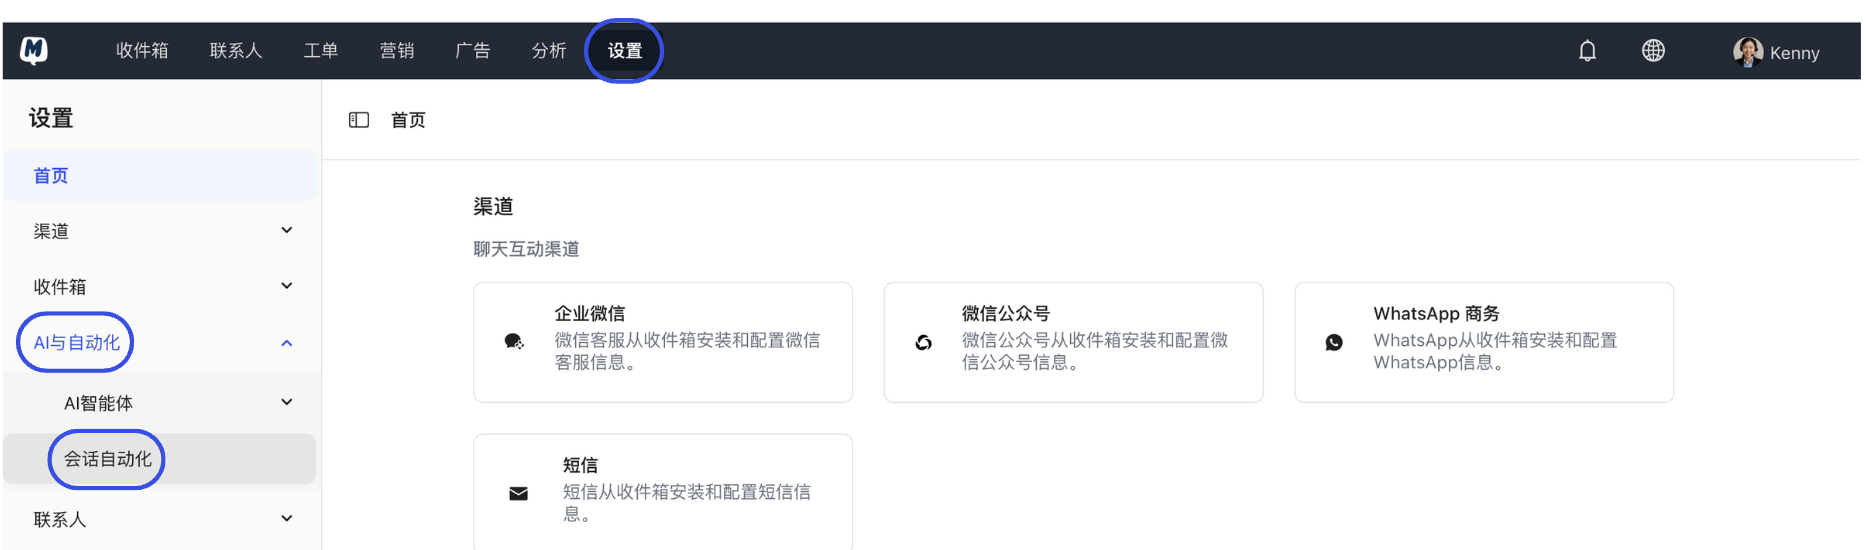
- Go to Settings > AI & Automation > Conversation Automation.
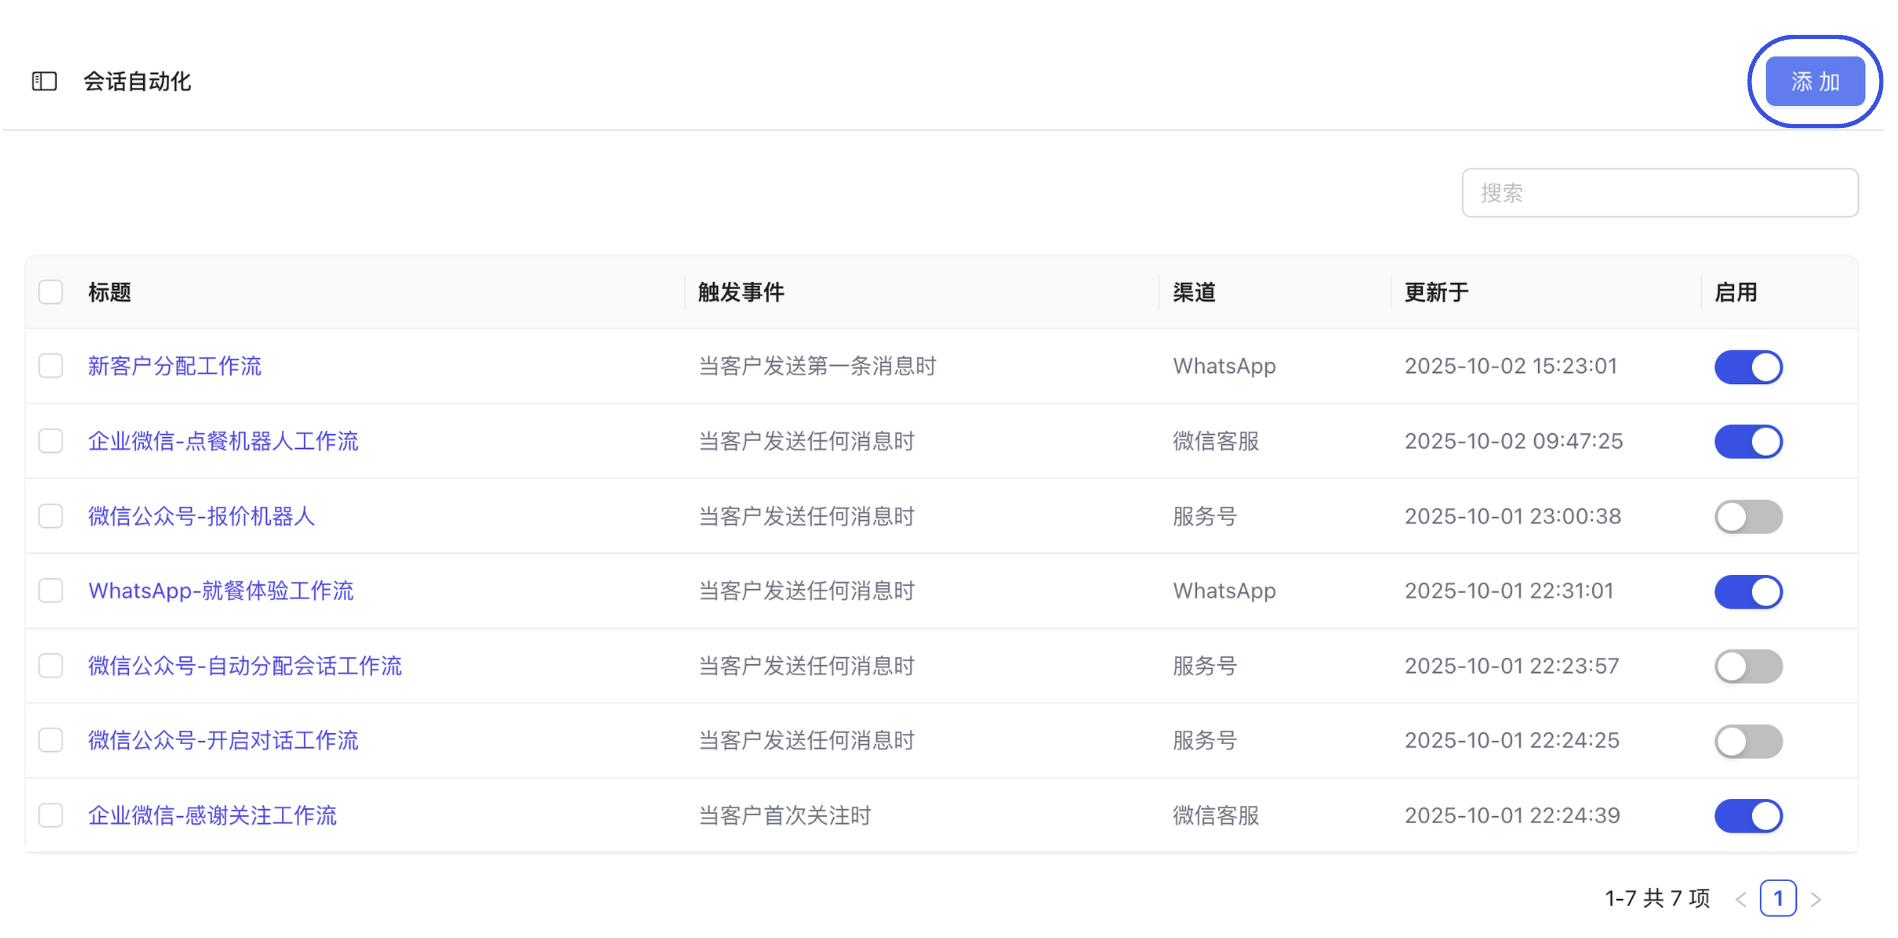
- Click the "Add" button in the top right corner.
Step 2: Configure Triggers
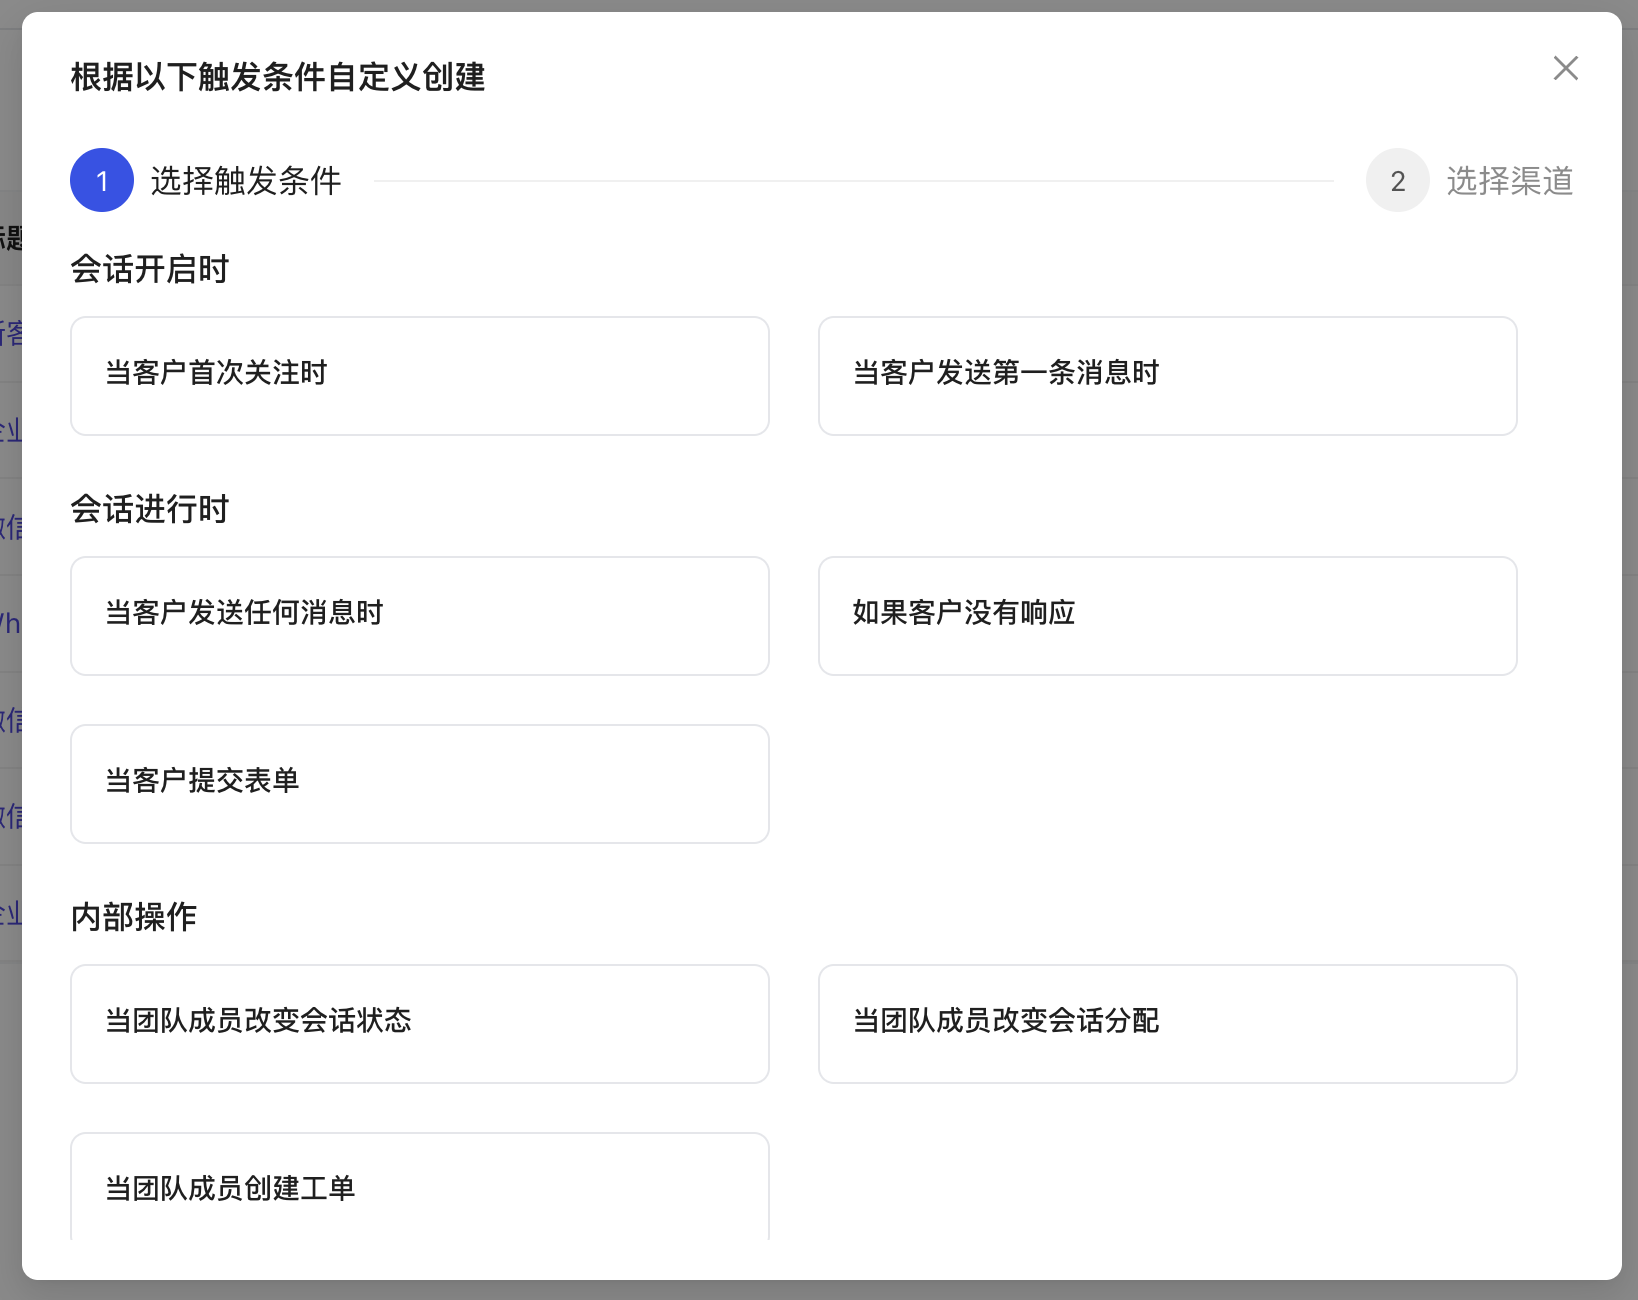
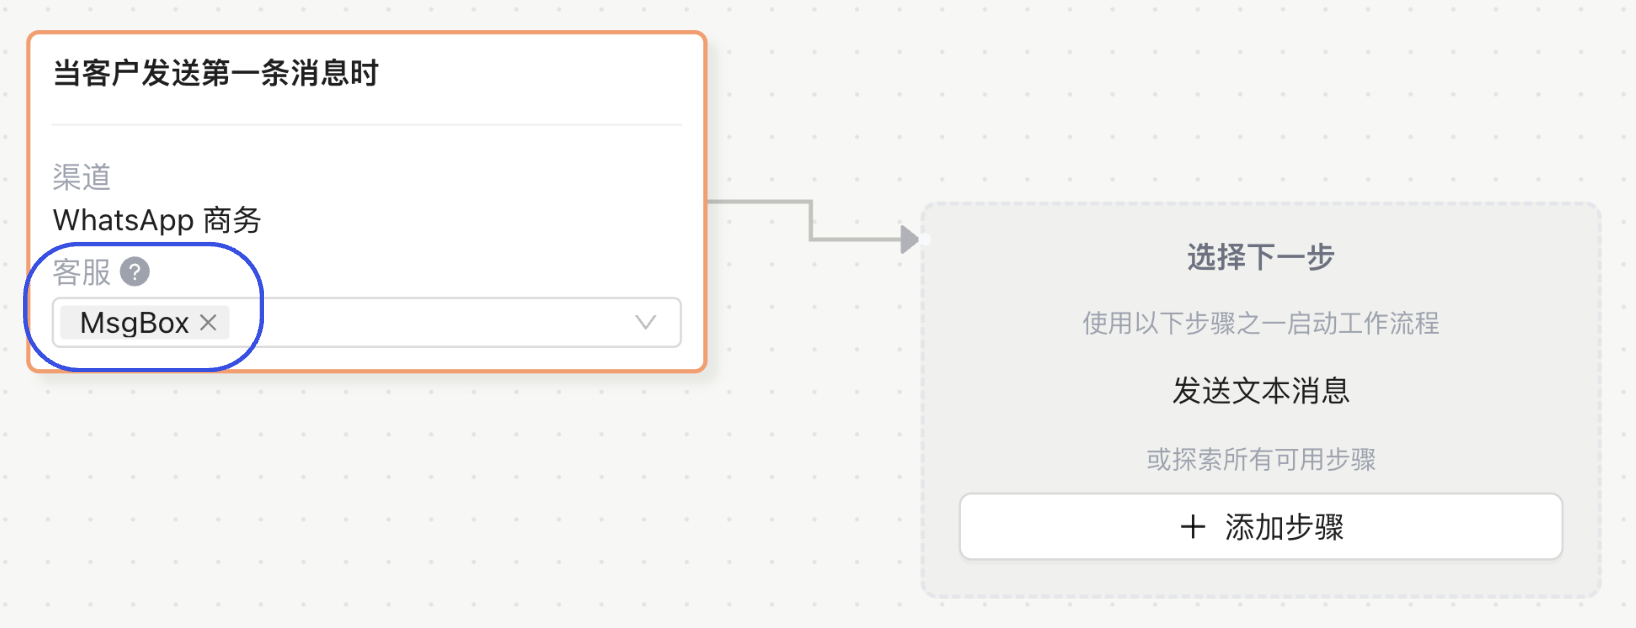
- Select a Trigger: For example, "Contact sends the first message" or "Conversation is opened."
- Select Channels: Specify which platforms this workflow applies to (e.g., WhatsApp, WeCom, etc.).

- Assign Account/Staff: Set the specific accounts for the selected channels in the trigger condition.
Step 3: Edit Workflow Steps
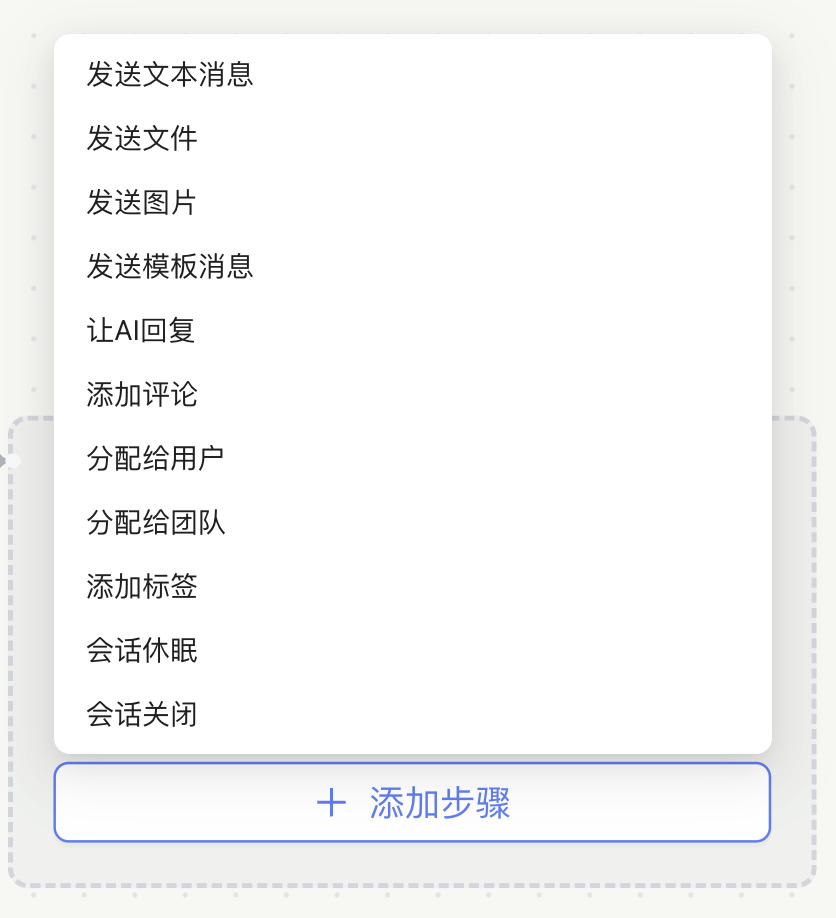
- Click "Add Step" and edit the flow based on your business logic (e.g., Send message -> Assign staff -> Add tag).
- Once editing is complete, click "Save."
Step 4: Enable the Workflow
- Return to the Conversation Automation list page and manually switch the status toggle to On.

Featured Function: Text Message Menu
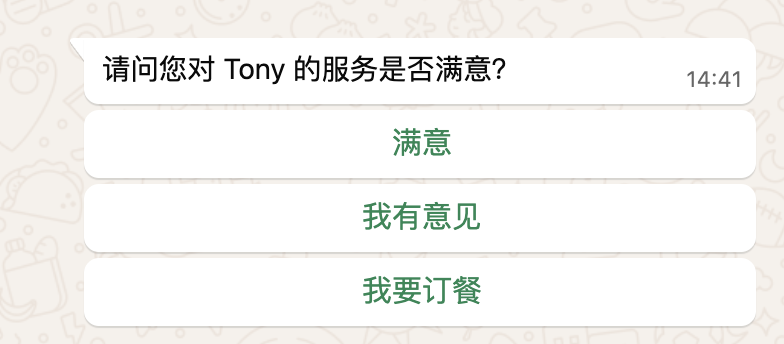
When choosing Send Text Message in the "Add Step" section, you can configure a "Menu Response." This allows you to provide customers with multiple options; clicking different options can trigger different subsequent automation paths.
- Configuration Interface:

- Display Comparison:
The left shows the MsgBox Inbox view, and the right shows the interaction as seen by the customer on WhatsApp.
Common Scenarios
Advanced Usage
- AI Collaboration: How to integrate AI Agents into workflows for automated reception?
- Smart Routing: How to automatically assign staff based on customer region or needs?
- Auto-Tagging: Automatically add an "Interested Customer" tag when a customer clicks the "Product Inquiry" menu.
Next Steps: