Personalized AI Agent Configuration
After completing the basic setup, you can inject "soul" and "knowledge" into your AI Agent. By setting a language style, uploading business documents, and configuring a greeting, the Agent will be able to communicate more professionally on behalf of your brand.
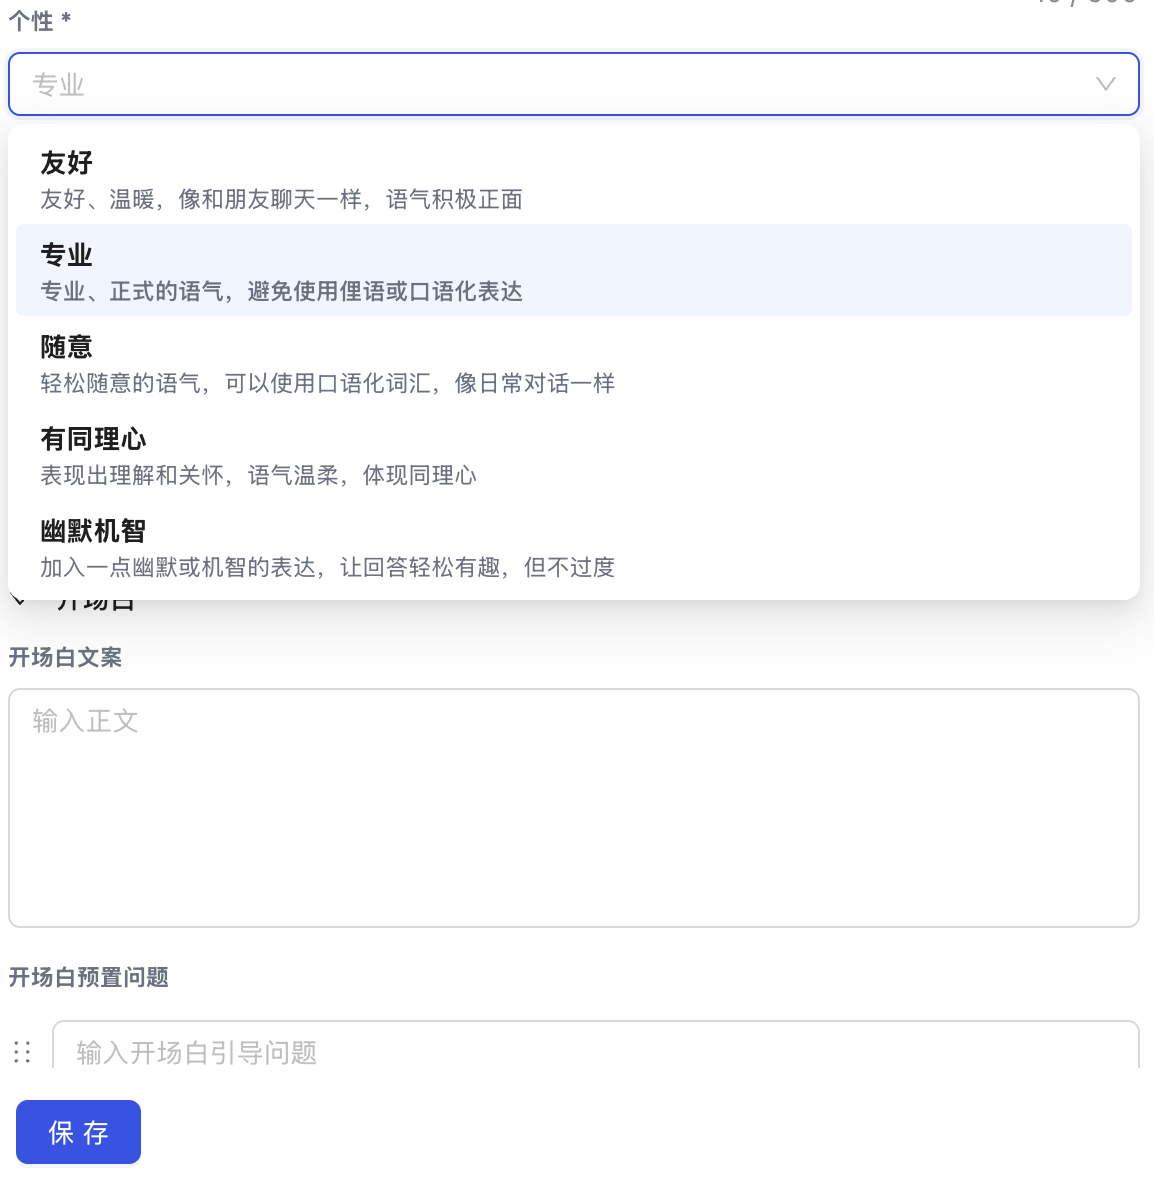
1. Set AI Agent Personality (Language Style)
An Agent's "Personality" determines the tone of its replies. You can choose the style that best fits your business scenario:
- Available Styles: Friendly, Professional, Casual, Empathetic, Witty.
- Path: Go to Settings > AI & Automation > AI Agent > Agents.
- Action: Select the target agent, choose your preferred style from the "Personality" dropdown, and click "Save".
2. Build and Edit the Agent Knowledge Base
The Knowledge Base is the core source of information for the AI Agent when answering questions. You can upload corporate manuals, product Q&As, or link official website URLs.
- Supported Formats: PDF, DOCX, TXT (must contain plain text).
- Not Supported: Images only, scanned documents, complex multi-column layouts.
- Size Limit: Maximum 20 MB per file.
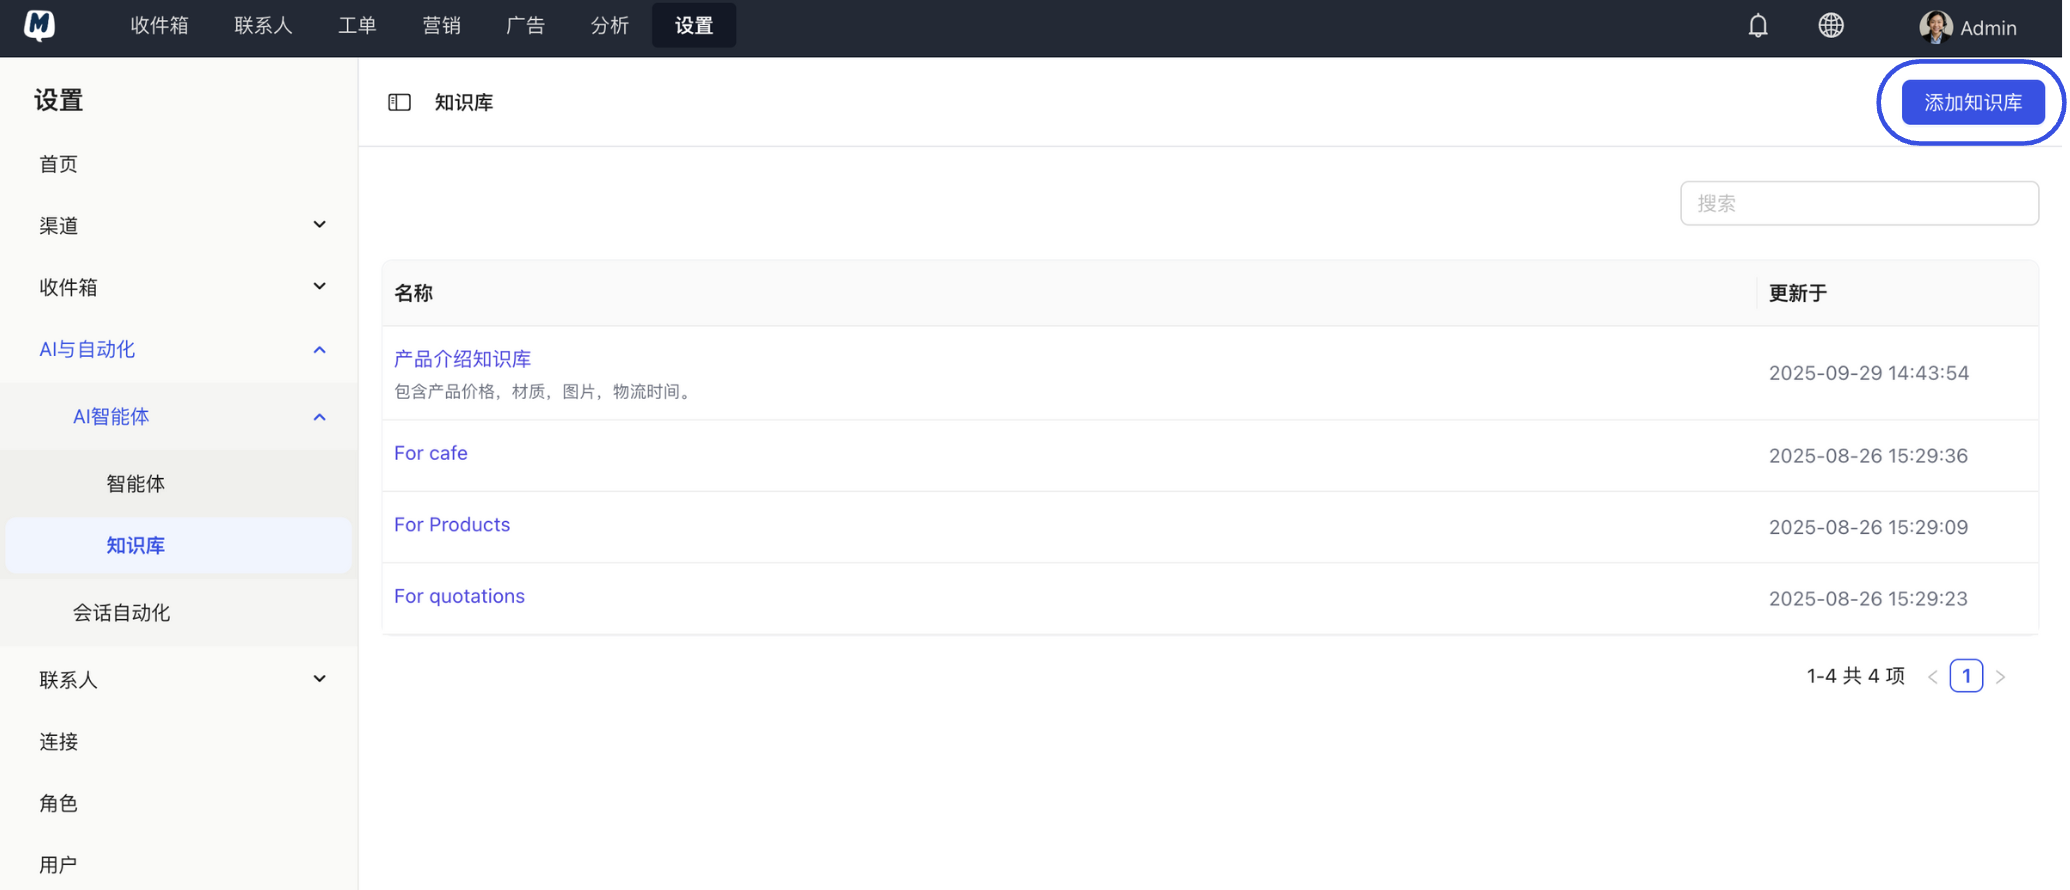
A. Add a New Knowledge Base
- Go to Settings > AI & Automation > AI Agent > Knowledge Base.
- Click "Add Knowledge Base", enter a name and description, and submit.
B. Edit Content (Upload Documents or Webpages)
- Click on the created base in the Knowledge Base list.
- Click "Add Content", and choose "Upload Document" or "Enter Webpage URL".
- Webpage Sync: You can set an update frequency so the AI can learn the latest content from your official website in real-time.
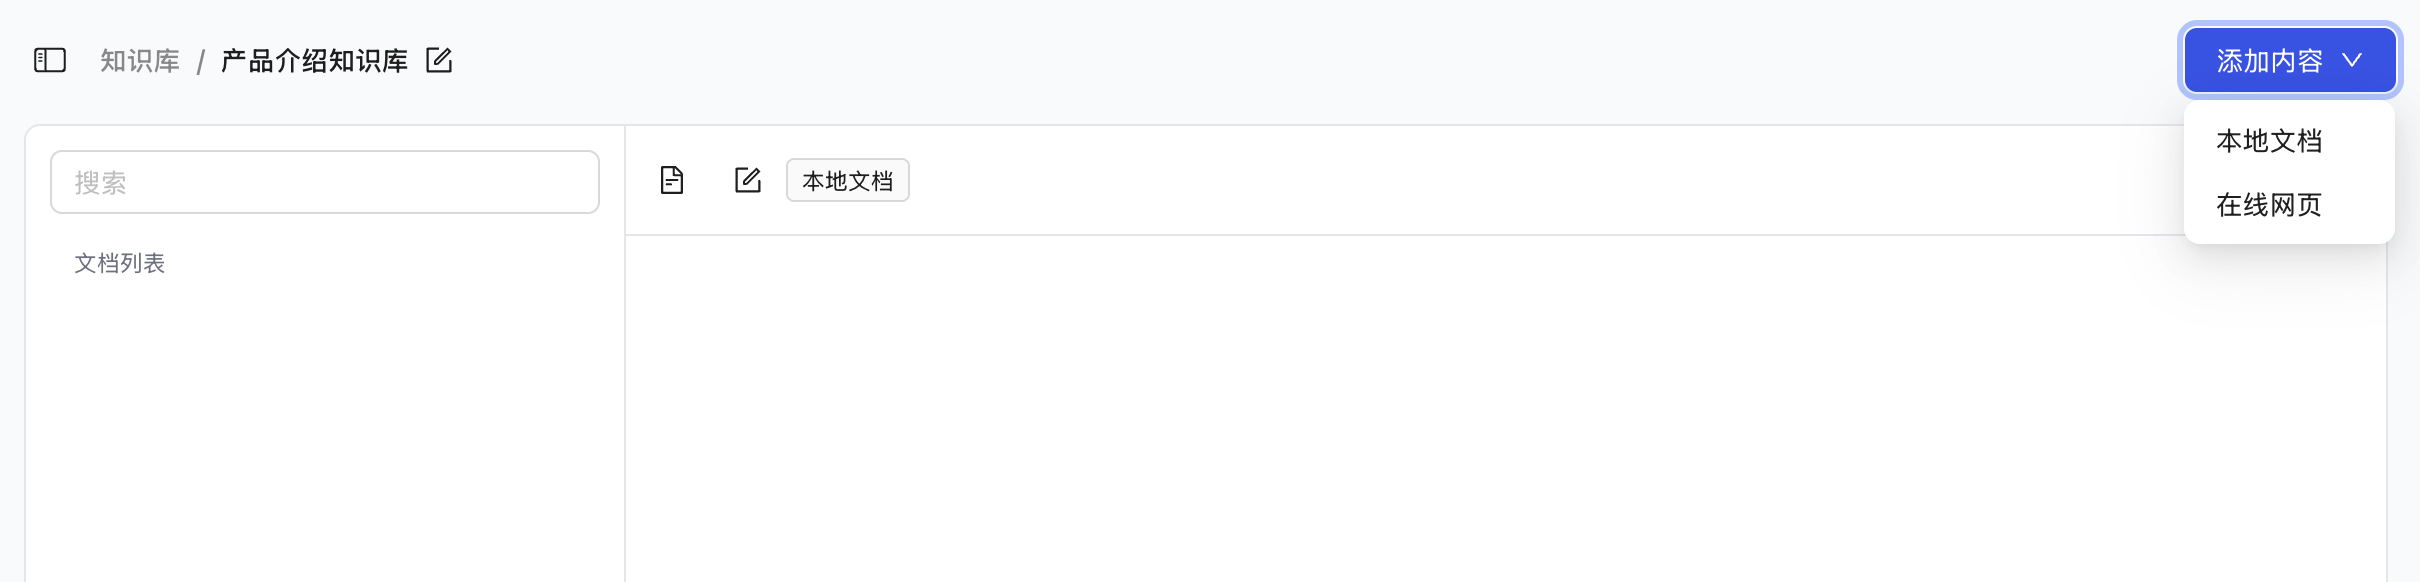
- Webpage Sync: You can set an update frequency so the AI can learn the latest content from your official website in real-time.
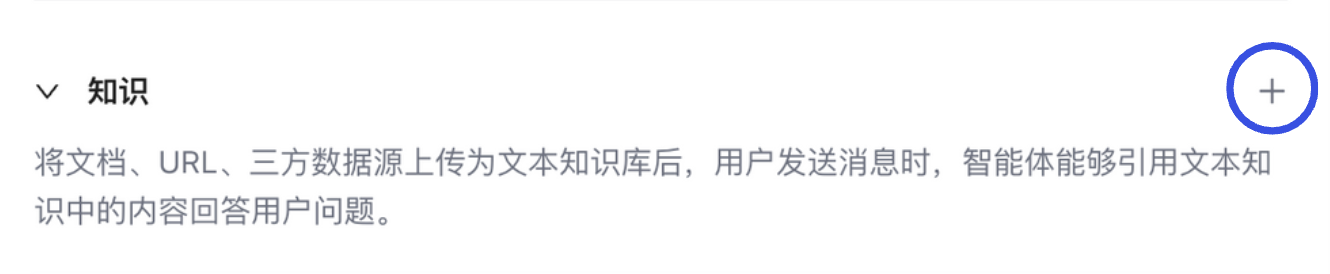
3. Apply Knowledge Base to an Agent
After creating a Knowledge Base, it must be linked to a specific Agent to take effect.
- Return to the Agents list and select the target agent.
- Click the "+" icon in the "Knowledge" section.
- Select one or more knowledge bases from the pop-up list and click "Add".
- Be sure to click the "Save" button at the bottom of the page.
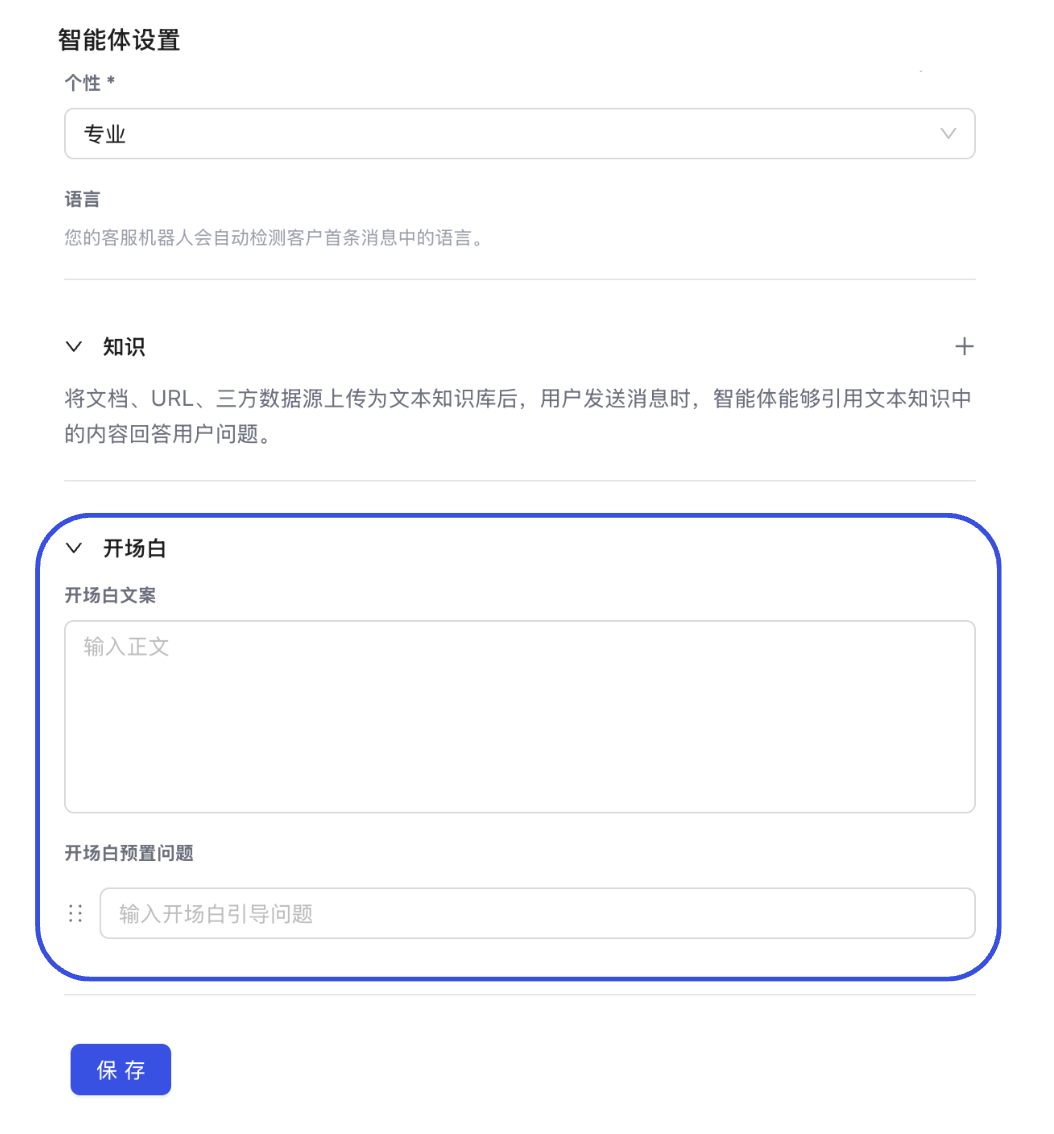
4. Set AI Agent Greetings
The greeting is the first impression a customer has after triggering the AI.
- In the "Greeting" section of the agent editing page, enter your welcome text.
- Pre-set Questions: You can set 3–5 frequently asked questions. When a customer clicks one, the AI will provide an immediate answer.
- Click "Save".
We recommend assigning multiple vertical knowledge bases to the same agent (e.g., one "Product Manual" base + one "After-sales Policy" base). This makes it easier to update specific modules independently later without affecting the overall logic.
Next Step: